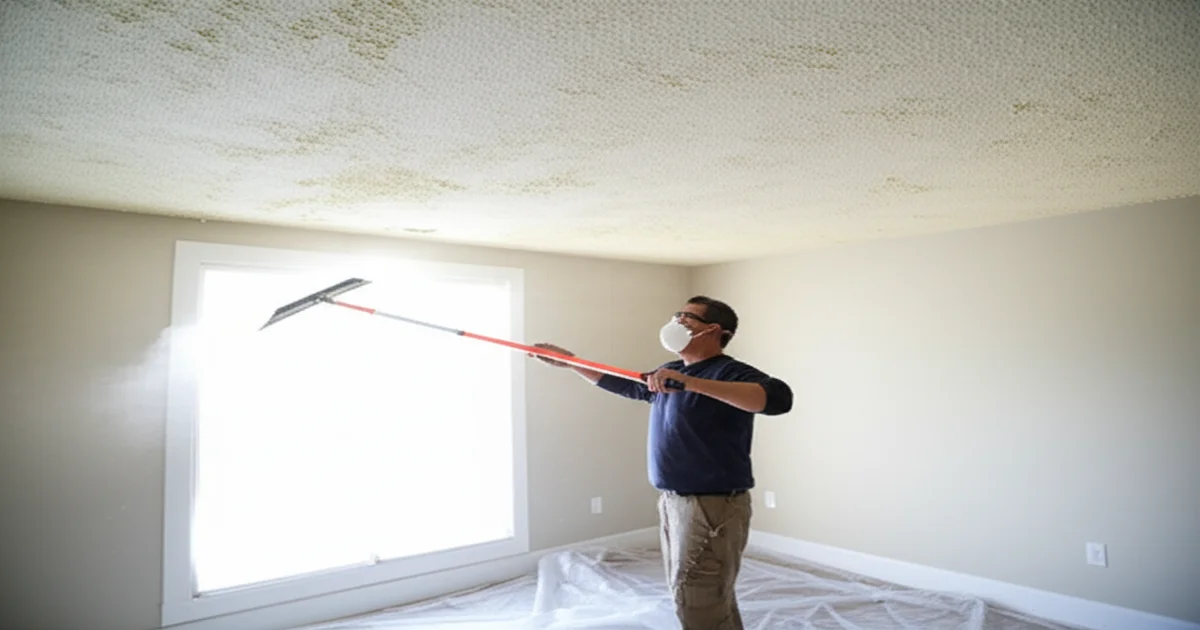
Understanding the Popcorn Ceiling Removal Process
The popcorn ceiling removal process is a multi-step professional service that transforms dated, textured ceilings into smooth, modern surfaces. Whether you are a homeowner in Toronto, Mississauga, Brampton, Vaughan, or anywhere in the Greater Toronto Area, understanding each stage of the removal process helps you prepare for the project and know what to expect during removal. This comprehensive guide walks you through every step from initial assessment to final paint.
Popcorn ceilings — also called stipple, textured, or acoustic ceiling removals — were applied to millions of Canadian homes from the 1950s through the 1990s. The textured coating was sprayed or trowelled onto drywall or plaster ceilings, creating a bumpy surface that hid imperfections and provided minor sound dampening. Today, most homeowners want these ceilings gone, and professional removal is the most efficient path to smooth, modern ceilings.
---
📚 Related Guides
Call 289-806-1616 to schedule your popcorn ceiling removal consultation anywhere in the GTA.
Step 1: Initial Assessment and Asbestos Testing
The process begins with a thorough assessment of your ceilings. A professional estimator visits your home to examine the ceiling texture type and condition, measure total square footage, identify any existing damage or water stains, note ceiling heights and accessibility challenges, and assess the underlying substrate (drywall vs. plaster).
asbestos testing in Toronto is the most critical part of the assessment. Homes built before 1990 in Ontario may contain asbestos fibres in their popcorn ceiling texture. The Ontario Building Code and provincial workplace safety regulations require that suspected asbestos materials be tested before any disturbance.
Testing involves collecting small samples from several ceiling locations. These samples are sent to a certified laboratory for polarized light microscopy (PLM) analysis. Results typically arrive within 2-3 business days.
Never skip this step. Even experienced professionals cannot identify asbestos by visual inspection alone. The health consequences of asbestos exposure — including mesothelioma and asbestosis — make testing a non-negotiable safety measure.
Why is Asbestos Testing so Important in East York and the GTA?
East York, like many areas within Toronto, saw a significant amount of housing development during the peak years of popcorn ceiling installation. This means many homes in neighborhoods like The Beaches, Danforth Village, and Leaside potentially have asbestos-containing materials. The age of the home is a key indicator, but even if you're unsure, testing is always the safest approach. Ignoring this step can expose you, your family, and any contractors working on your home to dangerous asbestos fibers.
Understanding Asbestos Abatement Procedures in Ontario
If your asbestos test comes back positive, don't panic. Certified asbestos abatement professionals in Ontario are trained to safely remove and dispose of asbestos-containing materials. The process involves strict adherence to regulations set by the Ontario Ministry of Labour, ensuring the safety of everyone involved. These procedures include:
Step 2: Preparation and Protection
Proper preparation separates professional results from amateur attempts. Before any scraping begins, the work area must be thoroughly prepared:
Furniture and Belongings — Ideally, rooms are emptied. When not possible, items are moved to the center and covered with heavy-duty plastic sheeting.
Floor Protection — Floors are covered with rosin paper or plastic sheeting, taped at edges to prevent moisture and debris from reaching your flooring. This is especially important for hardwood floors.
Wall Protection — Walls are covered with plastic sheeting extending from ceiling to floor, protecting paint and wallpaper from water spray and falling debris.
Electrical — Light fixtures, ceiling fans, and smoke detectors are removed or carefully covered. Electrical outlets on the ceiling are protected with plastic and tape. In some cases, the room breaker is turned off.
Containment — The doorway is sealed with plastic sheeting to prevent dust migration. For asbestos projects, full containment with negative air pressure is established using HEPA-filtered air scrubbers.
For more preparation tips, read our guide on how to prepare for popcorn ceiling removal.
Protecting Your Home in East York During Popcorn Ceiling Removal
Homes in East York often have unique architectural features, such as original hardwood floors and decorative plaster moldings. Protecting these features during popcorn ceiling removal is crucial. Our team takes extra care to ensure that your home is properly protected before any work begins. This includes:
The Importance of Proper Ventilation and Dust Control
Even with careful preparation, popcorn ceiling removal can generate a significant amount of dust. Proper ventilation and dust control are essential to minimize the impact on your indoor air quality. Our team uses HEPA-filtered air scrubbers to remove dust particles from the air and maintain a clean and healthy environment. We also recommend that homeowners consider the following:
Step 3: The Removal Techniques
The actual removal technique depends on the ceiling material and asbestos status:
Standard (Non-Asbestos) Wet Scraping
The industry standard for non-asbestos popcorn ceilings involves misting the ceiling lightly with water using a garden sprayer. The water soaks into the texture for 10-15 minutes, softening the material. Using wide drywall knives (10-14 inches), the softened texture is carefully scraped from the ceiling surface. Most ceilings require 2-3 passes. Painted-over popcorn ceilings are notably more difficult and may require chemical softeners.
Asbestos Abatement Removal
When asbestos is present, the process follows Ontario Ministry of Labour Type 2 or Type 3 procedures: full containment with sealed plastic barriers, HEPA-filtered negative air pressure units, workers in full protective suits with respirators, wet removal to minimize fibre release, all waste double-bagged in labelled asbestos disposal bags, air monitoring during and after removal, and clearance testing before containment is removed.
Learn more about asbestos popcorn ceiling removal.
Challenges of Removing Popcorn Ceilings in Older East York Homes
popcorn ceilings in older homess in East York can present unique challenges when it comes to popcorn ceiling removal. These challenges may include:
Our team has extensive experience working in older homes throughout the GTA and is equipped to handle these challenges effectively. We use specialized techniques and equipment to ensure that the popcorn ceiling is removed safely and efficiently, without causing further damage to your home.
Alternative Removal Methods for Difficult Popcorn Ceilings
In some cases, traditional wet scraping may not be the most effective method for removing popcorn ceilings. Alternative removal methods include:
Step 4: Repair and Finishing
Once the texture is removed, the ceiling surface requires careful finishing work:
Damage Assessment — Scraping inevitably reveals imperfections in the underlying drywall: gouges, nail pops, joint tape issues, cracks, and water damaged ceiling repair. All must be addressed before finishing.
Repairs — Damaged areas are patched with joint compound. Loose tape is re-embedded. Nail pops are set and covered. Cracks are filled and reinforced.
Skim Coating — A thin layer of joint compound is applied across the entire ceiling, creating a uniform surface that hides minor imperfections. Professional skim coating requires significant skill. Read about drywall repair after popcorn removal.
Sanding — Once the skim coat dries (typically 24 hours), the ceiling is sanded smooth using fine-grit sandpaper on pole sanders.
Priming — A quality ceiling primer seals the new surface and provides a uniform base for paint.
Achieving a Perfectly Smooth Finish in East York Homes
The key to a beautiful, modern ceiling is a perfectly smooth finish. Our team takes pride in our attention to detail and our commitment to achieving the highest quality results. We use only the best materials and techniques to ensure that your new ceiling is flawless. This includes:
Addressing Common Drywall Issues After Popcorn Ceiling Removal
Popcorn ceiling removal often reveals underlying drywall issues that need to be addressed before finishing. Common issues include:
Our team is experienced in repairing all types of drywall issues and will ensure that your ceiling is structurally sound and ready for finishing.
The Importance of Proper Priming for a Long-Lasting Finish
Priming is an essential step in the finishing process that is often overlooked. Primer seals the drywall, creates a uniform surface for paint, and helps the paint adhere properly. Using a high-quality primer can also prevent stains from bleeding through the paint and improve the overall durability of the finish.
Step 5: Painting and Completion
The final step is painting your new smooth vs popcorn ceiling comparison with flat or matte ceiling paint, applied in consistent overlapping passes. Two coats are standard for complete, even coverage. Most homeowners choose bright white to maximize light reflection.
Choosing the Right Paint for Your New Ceiling
The type of paint you choose for your new ceiling can have a significant impact on the overall look and feel of your room. Flat or matte paints are the most popular choices for ceilings because they minimize imperfections and create a soft, non-reflective surface. Other factors to consider when choosing paint include:
Final Inspection and Clean-Up
Once the painting is complete, our team will conduct a final inspection to ensure that the ceiling is flawless and that all work has been completed to your satisfaction. We will also thoroughly clean the work area, removing all debris and leaving your home in pristine condition.
Complete Cost Summary
For a typical GTA home with 1,200 square feet of ceiling:
Call 289-806-1616 for a detailed estimate tailored to your specific home and ceiling conditions.
Understanding the Factors That Influence Popcorn Ceiling Removal Costs
The cost of popcorn ceiling removal can vary depending on several factors, including:
We provide transparent and competitive pricing and will work with you to develop a solution that fits your budget.
Frequently Asked Questions
How long does the entire popcorn ceiling removal process take?
For a typical home, the complete process from assessment to final paint takes 1-2 weeks. The actual removal and finishing work usually spans 3-5 working days. Asbestos projects may add 2-3 additional days for containment setup and clearance testing.
Can popcorn ceilings be removed from all ceiling types?
Yes, but techniques vary. Drywall ceilings are the most straightforward. Plaster ceilings require more careful scraping. Concrete ceilings (common in condos) may require grinding rather than scraping.
What if my popcorn ceiling has been painted over?
Painted popcorn ceilings are more challenging because the paint creates a seal preventing water absorption. These ceilings require chemical stripping agents, dry scraping, or mechanical methods. The cost is typically 20-30% higher than unpainted popcorn removal.
Is there an alternative to removing popcorn ceilings?
Yes. Some homeowners opt to cover popcorn ceilings with new drywall rather than removing the texture. This is faster but adds weight to the ceiling structure and reduces room height slightly.
How do I choose between DIY and professional removal?
DIY can save money on non-asbestos ceilings but carries risks: water damage to floors, uneven finishing, and significant time investment. Professional removal ensures safety, quality results, and completion in days rather than weeks. See our DIY vs professional comparison.
What should I do to prepare for the removal crew?
Clear the room of furniture and wall decorations if possible. Remove curtains and blinds. Ensure clear access to the work area. Turn off HVAC in the work zone to prevent dust circulation. Your removal team handles all other preparation.
Will removing my popcorn ceiling increase my home's value in East York?
Yes, removing popcorn ceilings is generally considered a worthwhile investment that can increase your home's value and appeal, especially in a desirable neighbourhood like East York. Smooth, modern ceilings are a key selling point and can make your home more attractive to potential buyers. Outdated popcorn ceilings can detract from the overall aesthetic and make a home feel dated.
What are the benefits of smooth ceilings compared to popcorn ceilings?
Smooth ceilings offer several advantages over popcorn ceilings:
Ready to start your popcorn ceiling removal project? Contact our team for expert guidance and a free estimate. We serve Toronto, Mississauga, Brampton, Vaughan, Markham, Oakville, and the entire Greater Toronto Area. Call us today at 1-289-806-1616.