Popcorn Ceiling Removal: DIY vs Professional — Which to Choose?
Removing a popcorn ceiling is one of the most popular home improvement projects in Toronto. But should you tackle it yourself or hire a professional? Let's compare DIY vs professional popcorn ceiling removal so you can make the right choice.
The DIY Approach
Many Toronto homeowners consider DIY popcorn ceiling removal to save money. Here's what's involved:
What You'll Need
The DIY Process
DIY Pros
DIY Cons
The Professional Approach
Hiring a professional popcorn ceiling removal company like Popcorn Free offers significant advantages.
What Professional Removal Includes
Professional Pros
Professional Cons
Real Cost Comparison
Let's compare the true costs for a typical 200 sq ft room:
| Expense | DIY | Professional |
|---|---|---|
| Materials & supplies | $200–$400 | Included |
| Equipment rental | $100–$200 | Included |
| Asbestos test | $100–$150 | Coordinated |
| Your time (20+ hours) | $500+ value | $0 |
| Potential drywall repair | $100–$500 | Included |
| **Total** | **$500–$1,250+** | **$400–$900** |
When you factor in the value of your time and the risk of costly mistakes, professional removal is often comparable or even cheaper than DIY.
When DIY Might Make Sense
DIY popcorn ceiling removal might be appropriate if:
When to Hire a Professional
Professional removal is strongly recommended when:
Why Toronto Homeowners Choose Popcorn Free
At Popcorn Free, we've removed thousands of popcorn ceilings across Toronto and the GTA. Our clients choose us because:
Get Started Today
Ready to skip the DIY headaches and get a perfect result? Call 289-806-1616 for a free estimate from Toronto's popcorn ceiling removal specialists.
Real Customer Experiences: DIY vs Professional
Sarah's DIY Story — Etobicoke
"I watched YouTube videos and thought removing my popcorn ceiling would be a weekend project. I spent three full weekends on my living room alone. The scraping was exhausting — my arms and neck were sore for days. The worst part was the mess. Despite all the plastic sheeting, the wet popcorn slurry got everywhere. When I finally finished scraping, the ceiling had gouges and uneven patches everywhere. I tried to skim coat it myself, but the finish was bumpy and you could see every imperfection with the lights on. I ended up hiring Popcorn Free to fix my DIY job, which cost almost as much as if I'd hired them from the start."
Mike's Professional Experience — Scarborough
"After seeing my neighbour's DIY disaster, I went straight to Popcorn Free. They did our entire 1,800 sq ft home in three days. The dustless method was amazing — we expected a huge mess but came home to perfectly smooth vs popcorn ceiling comparisons and clean floors. Our house looks 20 years newer. Best renovation money we've ever spent."
The Chen Family — North York
"We tried removing popcorn from one bedroom ourselves first as a test. It took us an entire long weekend and the result was... okay but far from perfect. Then we realized we needed to do the living room, dining room, and hallway. That's when we called Popcorn Free. They were in and out in two days, and the whole house looks fantastic. We wish we'd just called them from the start!"
Diving Deeper into the DIY Process: A Step-by-Step Guide
While we generally recommend professional removal, understanding the DIY process is helpful. Let's break down each step in more detail:
1. Asbestos Testing: Why It's Non-Negotiable
If your home was built before 1990 (and especially before the mid-1980s), asbestos testing in Toronto is absolutely crucial. Asbestos was a common component in popcorn ceilings for its fire-retardant properties. Disturbing it releases microscopic fibers into the air, which can cause serious respiratory illnesses like mesothelioma and lung cancer decades later.
How to Test: You can purchase a DIY asbestos testing kit from a hardware store, but it's generally safer and more accurate to hire a certified asbestos inspector. They'll take samples and send them to a lab for analysis. If asbestos is present, do not attempt to remove the ceiling yourself*. Contact a licensed asbestos abatement company. This is non-negotiable for your health and safety.
2. Room Preparation: A Fortress Against Mess
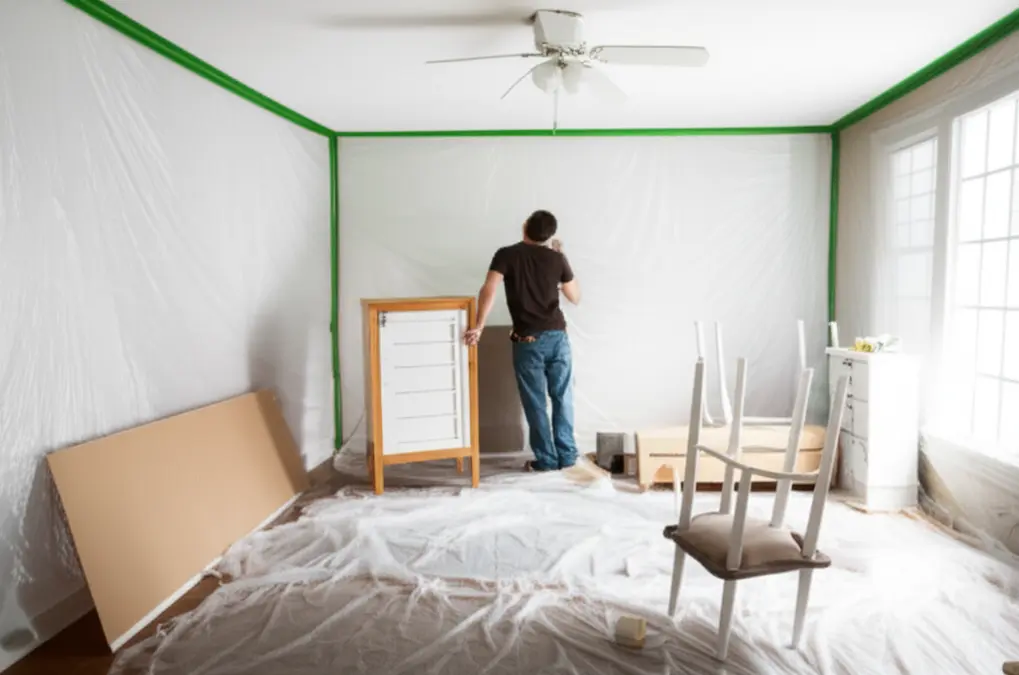
This is where most DIYers underestimate the effort involved. Proper room preparation is critical to minimizing the mess.
* Furniture Removal: Completely remove all furniture from the room. If that's impossible, move everything to the center and cover it with heavy-duty plastic sheeting.
* Floor Protection: Use thick drop cloths (canvas is better than plastic) to cover the entire floor. Overlap the edges and secure them with painter's tape.
* Wall Protection: Cover the walls with plastic sheeting, extending it at least 2–3 feet up from the floor. Secure it tightly with painter's tape.
* HVAC System: Seal off all air vents and returns in the room with plastic and tape to prevent dust from circulating throughout your home.
* Lighting Fixtures: Turn off the electricity to the room at the breaker box. Carefully remove light fixtures and ceiling fans. Cover the electrical boxes with plastic and tape.
3. Wetting the Ceiling: The Key to Easier Scraping
The goal is to saturate the popcorn texture without soaking the drywall underneath.
* Use a Garden Sprayer: A garden sprayer provides a more even and controlled application than a spray bottle.
* Warm Water: Use warm water to help dissolve the texture.
* Don't Over-Saturate: Apply the water in a light, even coat. You want the texture to be damp, not dripping wet.
* Wait 15–20 Minutes: Allow the water to soak in and soften the texture. Test a small area with your drywall knife to see if it scrapes off easily. If not, wait a bit longer.
4. Scraping the Texture: Patience and Technique
This is the most physically demanding part of the process.
* Use a Wide Drywall Knife: A 6" or 12" drywall knife is ideal. Keep the blade clean and sharp.
* Angle the Knife: Hold the knife at a slight angle to the ceiling.
* Apply Even Pressure: Use smooth, consistent strokes. Avoid gouging the drywall.
* Work in Small Sections: Scrape off the texture in small sections at a time.
* Dispose of Scraped Material: Have a large garbage bag or container nearby to collect the scraped material.
5. Drywall Repair: Fixing the Damage
Inevitably, you'll gouge or damage the drywall during scraping.
* Assess the Damage: Identify any gouges, dents, or imperfections in the drywall.
* Apply Joint Compound: Use a wide drywall knife to apply a thin, even coat of joint compound over the damaged areas.
* Feather the Edges: Feather the edges of the joint compound to blend it seamlessly with the surrounding drywall.
* Let it Dry: Allow the joint compound to dry completely (usually 24 hours).
* Sand Smooth: Use fine-grit sandpaper to sand the repaired areas smooth. Be careful not to sand too much, or you'll create dips in the drywall.
* Repeat as Needed: You may need to apply multiple coats of joint compound and sand between coats to achieve a perfectly smooth surface.
6. Sanding: Achieving a Smooth Finish
Sanding is crucial for creating a smooth, paintable surface.
* Use a Sanding Pole: A sanding pole will make it easier to reach the ceiling and apply even pressure.
* Start with Medium-Grit Sandpaper: Use medium-grit sandpaper (120-grit) to remove any remaining imperfections.
* Finish with Fine-Grit Sandpaper: Use fine-grit sandpaper (220-grit) to create a smooth, polished surface.
* Wear a Mask: Sanding creates a lot of dust, so be sure to wear a proper N95 mask.
* Vacuum the Ceiling: After sanding, vacuum the ceiling thoroughly to remove all dust particles.
7. Priming and Painting: The Final Touches
Priming is essential for sealing the drywall and ensuring proper paint adhesion.
* Apply Primer: Use a high-quality primer specifically designed for drywall. Apply one or two coats, following the manufacturer's instructions.
* Let it Dry: Allow the primer to dry completely before painting.
* Apply Paint: Use a high-quality ceiling paint. Apply two coats, allowing each coat to dry completely before applying the next.
* Use the Right Tools: Use a paint roller with an extension pole to reach the ceiling.
* Cut in the Edges: Use a paintbrush to cut in the edges of the ceiling where it meets the walls.
Common DIY Mistakes to Avoid in Toronto Homes
Toronto's popcorn ceilings in older homess, especially in areas like The Annex and Rosedale, often present unique challenges. Here are some common DIY mistakes to avoid:
* Skipping Asbestos Testing: As mentioned earlier, this is the biggest and most dangerous mistake.
* Inadequate Room Preparation: Failing to properly protect your floors, walls, and furniture will result in a huge mess.
* Over-Wetting the Ceiling: Soaking the drywall can cause it to sag or crumble.
* Gouging the Drywall: Applying too much pressure while scraping can damage the drywall.
* Poor Drywall Repair: Inadequate drywall repair will result in an uneven, unsightly finish.
* Insufficient Sanding: Failing to sand the ceiling smooth will result in a textured, unprofessional look.
* Using the Wrong Primer or Paint: Using the wrong primer or paint can result in poor adhesion and an uneven finish.
Understanding the Dustless Popcorn Ceiling Removal Method
The dustless method, employed by professionals like Popcorn Free, uses specialized equipment to contain the dust and debris generated during the removal process. This significantly reduces the mess and health risks of popcorn ceilingss associated with traditional DIY methods.
* HEPA Filtration: Dustless systems use HEPA (High-Efficiency Particulate Air) filters to capture even the smallest dust particles.
* Negative Air Pressure: Some systems create negative air pressure in the room to prevent dust from escaping into other areas of the house.
* Specialized Scraping Tools: Professionals use specialized scraping tools that are designed to minimize dust creation.
* Regular Cleaning: The work area is regularly cleaned to remove any accumulated dust and debris.
The Importance of Proper Ventilation
Whether you choose DIY or professional removal, proper ventilation is crucial.
* Open Windows: Open windows to allow fresh air to circulate.
* Use Fans: Use fans to help circulate the air and remove dust particles.
* Wear a Mask: Always wear a proper N95 mask to protect yourself from dust and debris.
Beyond Removal: Considering Ceiling Texture Options
Once the popcorn ceiling is removed, you have the opportunity to choose a new ceiling texture. Some popular options include:
* Smooth Finish: A smooth finish is the most modern and popular option. It creates a clean, minimalist look.
* orange peel texture guide: Orange peel texture is a subtle, slightly textured finish that is easy to apply and maintain.
* knockdown texture guide: Knockdown texture is a more pronounced texture that is created by applying joint compound and then knocking it down with a drywall knife.
* Swirl Texture: Swirl texture is a decorative texture that is created by applying joint compound in a swirling pattern.
Consult with a professional to determine the best texture option for your home.
Popcorn Ceiling Removal and Home Value in the GTA
Removing a popcorn ceiling can significantly increase the value of your home, particularly in competitive markets like Toronto. Potential buyers often view popcorn ceilings as outdated and undesirable. Removing them creates a more modern and appealing look, making your home more attractive to a wider range of buyers. This is especially true in neighborhoods like Leslieville and Riverdale where modern aesthetics are highly valued.
Frequently Asked Questions
How long does it take to remove a popcorn ceiling?
DIY popcorn ceiling removal can take 2-4 days for a single room, depending on the size and your experience level. Professional removal typically takes just one day per room.
How much does professional popcorn ceiling removal cost in Toronto?
Professional popcorn ceiling popcorn ceiling removal in Toronto typically costs between $2 and $4.50 per square foot. This includes all materials, labor, and cleanup.
Is popcorn ceiling removal messy?
DIY popcorn ceiling removal is extremely messy. The wet texture creates a slurry that gets everywhere. Professional removal using the dustless method minimizes mess and dust.
What if my popcorn ceiling contains asbestos?
If your popcorn ceiling contains asbestos, you should not attempt to remove it yourself. Contact a licensed asbestos abatement company to handle the removal safely and legally.
Get Started Today
Ready to skip the DIY headaches and get a perfect result? Call 289-806-1616 for a free estimate from Toronto's popcorn ceiling removal specialists. We serve all areas of the GTA, from Mississauga to Pickering, and are ready to transform your ceilings! Check out our service areas or learn more about our dustless removal process.
---