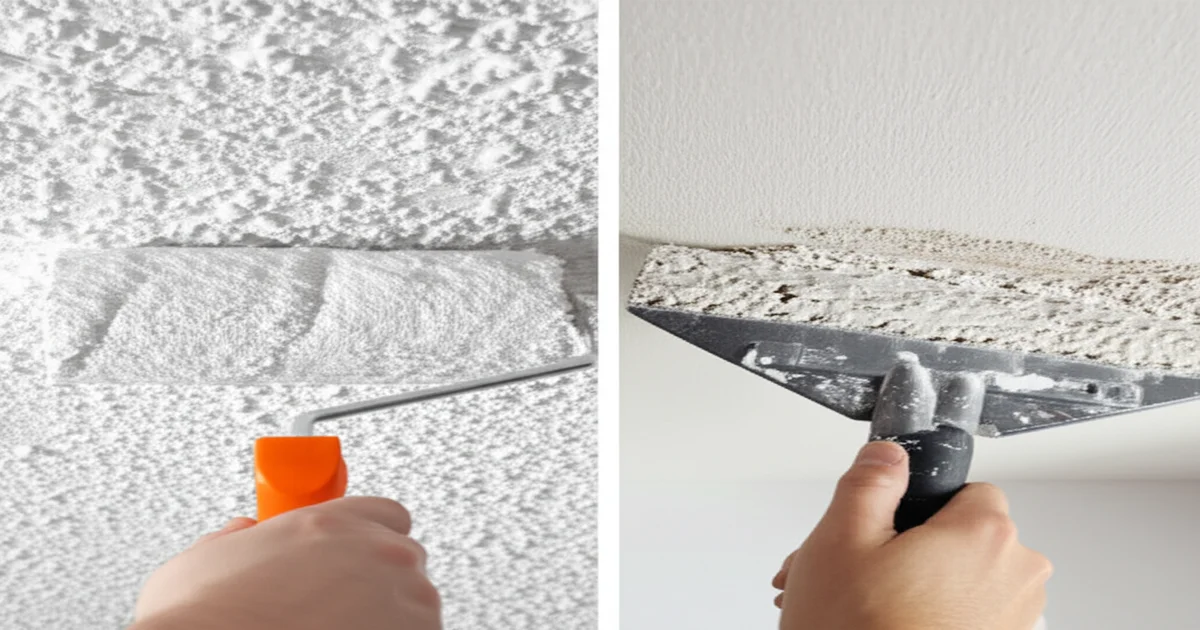
15 Pro Tips for Popcorn Ceiling Removal
These 15 professional tips for popcorn ceiling removal come from years of experience transforming homes across Toronto, Mississauga, Brampton, Vaughan, and the Greater Toronto Area. Whether you are hiring professionals or considering a DIY approach, these insider secrets will help you achieve the best possible results and avoid costly mistakes that plague many ceiling renovation projects.
Popcorn ceiling removal seems straightforward — spray water, scrape texture, finish smooth. But the difference between amateur results and professional quality comes down to technique, preparation, and knowing the tricks that only experience teaches. These tips apply whether your home is in downtown Toronto, suburban Oakville, or anywhere across the GTA.
---
📚 Related Guides
Call 289-806-1616 to get professional results on your popcorn ceiling removal project.
Tip 1: Always Test for Asbestos First
This is not optional. Every home built before 1990 in Ontario must be tested before any ceiling texture is disturbed. Asbestos testing costs $200–$400 — a tiny fraction of the project cost and an absolute necessity for your family's safety. The Ontario Building Code requires it, and the health consequences of asbestos exposure are severe and irreversible. See our asbestos ceiling guide.
Asbestos was commonly used in building materials, including popcorn ceilings, for its fire-resistant and insulation properties. However, inhaling asbestos fibers can lead to serious health problems, including lung cancer, mesothelioma, and asbestosis.
If your home was built before 1990, the safest and most responsible course of action is to hire a certified asbestos testing in Toronto company to collect a sample of your popcorn ceiling and have it analyzed in a lab. They will provide you with a detailed report indicating whether or not asbestos is present. If asbestos is found, you'll need to hire a licensed asbestos abatement contractor to safely remove the ceiling. Attempting to remove asbestos-containing materials yourself is illegal and extremely dangerous. Remember, your health and the health of your family are paramount. This is especially important if you are located in older neighborhoods like Rosedale or Cabbagetown in Toronto, where many homes predate 1990.
Tip 2: Check If the Ceiling Has Been Painted
Run your hand across the ceiling. Unpainted popcorn feels rough and chalky. Painted popcorn feels harder and smoother. This distinction matters enormously because painted popcorn does not absorb water, making the standard wet-scraping technique much less effective. Painted ceilings may require chemical stripping agents or dry scraping, which is messier and more difficult. Cost increases 20-30% for painted popcorn.
Painted popcorn ceilings present a significant challenge because the paint creates a barrier that prevents water from penetrating the texture. This makes the scraping process much more difficult and time-consuming. If your popcorn ceiling has been painted, you have a few options:
Tip 3: Use Warm Water with a Drop of Dish Soap
When misting unpainted popcorn, warm water penetrates the texture faster than cold water. Adding a small amount of dish soap (a few drops per gallon) breaks surface tension, allowing water to soak in more effectively. This simple trick can reduce scraping effort by 30-40%. Let the water soak for 15 minutes before scraping.
The science behind this tip is simple but effective. Warm water has a lower surface tension than cold water, allowing it to spread more easily and penetrate the popcorn texture more quickly. The dish soap further reduces surface tension, helping the water to soak in even faster.
When mixing your solution, use a mild dish soap like Dawn or Palmolive. Avoid using detergents that contain bleach or other harsh chemicals, as these can damage the drywall or cause discoloration. A few drops per gallon is all you need – too much soap can create excessive suds and make the scraping process more difficult.
After spraying the ceiling with the warm water and soap solution, allow it to soak for at least 15 minutes. This will give the water time to penetrate the texture and loosen it from the drywall. You may need to let it soak for longer if the popcorn texture is particularly thick or dense.
Tip 4: Work in Small Sections
Do not spray the entire ceiling at once. Work in 4x4-foot sections. Spray one section, let it soak while you spray the next, then return to scrape the first section. This ensures optimal moisture content for each area. If texture dries before scraping, it becomes much harder to remove.
This approach prevents the water from drying out before you have a chance to scrape the texture. Working in smaller sections allows you to maintain optimal moisture content, making the scraping process much easier and more efficient. It also minimizes the risk of damaging the drywall underneath.
If you're working in a large room, you may need to divide the ceiling into even smaller sections to ensure that the water doesn't dry out. You can also use a spray bottle to re-wet any areas that start to dry before you're ready to scrape them.
Tip 5: Invest in a Quality Scraping Knife
A 10-inch or 12-inch drywall knife is ideal. Cheap, thin blades flex and gouge the drywall underneath. A rigid, quality blade removes texture cleanly without damaging the ceiling surface. Round the corners of the blade slightly with a file to reduce gouging risk.
A quality scraping knife is an essential tool for popcorn ceiling removal. A cheap, flimsy blade will flex and bend, making it difficult to remove the texture cleanly and increasing the risk of gouging the drywall. A rigid, high-quality blade will provide more control and allow you to remove the texture with less effort and less damage.
Look for a drywall knife with a comfortable handle and a blade made of tempered steel. The blade should be at least 10 inches wide, and preferably 12 inches for larger areas. Before using the knife, round the corners slightly with a file to prevent them from digging into the drywall. This simple step can significantly reduce the risk of gouging and ensure a smoother, more professional finish.
Tip 6: Protect Everything Below
Popcorn ceiling removal generates a tremendous amount of wet, sticky debris. Cover floors with rosin paper topped with plastic sheeting. Tape plastic to walls up to ceiling height. Remove all furniture, light fixtures, and wall decorations. Cover HVAC vents with plastic and tape. The cost of protection materials is minimal compared to cleaning or replacing damaged flooring. Read about preparation for removal.
Protecting your floors, walls, and furniture is crucial before starting any popcorn ceiling removal project. The wet, sticky debris generated during the process can be difficult to clean and can damage surfaces if not properly protected.
Start by removing all furniture, light fixtures, and wall decorations from the room. Cover the floors with a layer of rosin paper to protect against scratches and spills, followed by a layer of plastic sheeting to provide a waterproof barrier. Tape the plastic sheeting to the walls up to ceiling height to prevent debris from getting behind the plastic.
Cover HVAC vents with plastic and tape to prevent dust and debris from entering the ventilation system. You may also want to consider covering doorways with plastic to contain the mess and prevent it from spreading to other parts of your home. The time and money spent on protection materials will be well worth it in the long run, saving you hours of cleaning and preventing costly repairs.
Tip 7: Disconnect Electrical at the Breaker
Ceiling fixtures, smoke detectors, and any electrical connections on the ceiling should be disconnected at the breaker — not just switched off. Water and wet debris combined with live electricity creates a serious shock hazard. Verify circuits are dead with a voltage tester before beginning work.
Safety should always be your top priority when working with electricity. Before removing any ceiling fixtures or working near electrical wiring, disconnect the power at the breaker. Simply switching off the lights is not enough, as there may still be live wires in the ceiling.
Use a voltage tester to verify that the circuits are dead before touching any wires. If you are not comfortable working with electricity, hire a qualified electrician to disconnect and reconnect the fixtures for you. Water and electricity are a dangerous combination, and taking the proper precautions can prevent serious injury or even death. This is especially important in popcorn ceilings in older homess in areas like Little Italy or Greektown, where wiring may not be up to current standards.
Tip 8: Do Not Over-Wet the Ceiling
More water is not better. Over-wetting can damage the drywall paper face, create mud that is harder to scrape, and cause water damaged ceiling repair to the ceiling structure. The goal is to soften the texture just enough for easy removal. Light misting that penetrates the texture without dripping is the target.
Finding the right balance of moisture is key to successful popcorn ceiling removal. Over-wetting the ceiling can damage the drywall paper face, making it difficult to scrape and increasing the risk of gouging. It can also create a muddy mess that is harder to clean up and can lead to water damage to the ceiling structure.
The goal is to apply just enough water to soften the texture without causing it to become saturated. Light misting that penetrates the texture without dripping is the ideal approach. If you notice water dripping from the ceiling, you've likely applied too much. Use a sponge to absorb the excess water and allow the ceiling to dry slightly before continuing.
Tip 9: Scrape With the Grain
Drywall joints run in consistent directions. Scraping parallel to the joints (rather than across them) reduces the risk of catching and pulling tape. If you feel resistance at a joint, adjust your angle rather than forcing through.
Drywall joints are the seams where two sheets of drywall meet. These joints are typically covered with paper tape and joint compound to create a smooth, seamless surface. Scraping across these joints can cause the tape to catch on the scraping knife, potentially pulling it away from the drywall and damaging the surface.
To avoid this, scrape parallel to the drywall joints. This will minimize the risk of catching the tape and ensure a smoother, more consistent finish. If you feel resistance at a joint, adjust your angle slightly rather than forcing through.
Tip 10: Expect Imperfections Underneath
No popcorn ceiling removal reveals perfect drywall underneath. You will find nail pops, tape bubbles, joint compound imperfections, gouges from scraping, and possibly water stains. Budget for skim coating the entire ceiling — spot repairs alone rarely produce professional-looking results.
It's important to have realistic expectations about the condition of the drywall underneath the popcorn ceiling. In most cases, you'll find a variety of imperfections, including nail pops, tape bubbles, joint compound imperfections, gouges from scraping, and possibly water stains. These imperfections are normal and should not be a cause for concern.
However, it's important to address these imperfections before painting the ceiling. Attempting to paint over them will only make them more noticeable. The best way to achieve a smooth, professional finish is to skim coat the entire ceiling with joint compound. This will create a uniform surface that is free of imperfections and ready for paint.
Tip 11: Skim Coat Is Not Optional
The biggest mistake DIY removers make is skipping or rushing the skim coat. Without a full ceiling skim coat, every imperfection shows under light, especially with modern LED lighting. Professional skim coating with joint compound creates the smooth, uniform surface that distinguishes professional work. Read about drywall repair after removal.
Skim coating is a crucial step in popcorn ceiling removal. It involves applying a thin layer of joint compound to the entire ceiling to create a smooth, uniform surface. This process fills in any imperfections, such as nail pops, tape bubbles, and gouges, and creates a seamless canvas for painting.
Skipping or rushing the skim coat is a common mistake that DIY removers make. Without a full ceiling skim coat, every imperfection will be visible under light, especially with modern LED lighting. This can result in a ceiling that looks uneven and unprofessional. Professional skim coating with joint compound is what separates amateur work from a truly polished result.
Tip 12: Sand Between Coats
Each skim coat application should be lightly sanded after drying to remove ridges, bumps, and tool marks before the next coat. Typically two to three skim coats are needed, with sanding between each. Use 120-150 grit sandpaper on a pole sander for consistent results.
Sanding between coats of skim coat is essential for achieving a smooth, flawless finish. After each application of joint compound, allow it to dry completely before sanding. Use 120-150 grit sandpaper on a pole sander to remove any ridges, bumps, or tool marks.
A pole sander will allow you to reach the entire ceiling without having to climb up and down a ladder. Use light pressure and consistent strokes to avoid sanding too much in one area. After sanding, wipe the ceiling clean with a damp cloth to remove any dust. Repeat this process after each coat of skim coat until you achieve a smooth, uniform surface.
Tip 13: Use Raking Light to Check Your Work
After finishing, shine a bright light at a low angle across the ceiling (raking light). This reveals imperfections invisible under normal overhead lighting. Check from multiple angles and directions. Any bumps, ridges, or depressions visible under raking light will be visible under certain lighting conditions once the room is furnished.
Raking light is a technique used to reveal imperfections on a surface by shining a bright light at a low angle. This type of lighting casts shadows that highlight any bumps, ridges, or depressions that would otherwise be invisible under normal overhead lighting.
After finishing the skim coating and sanding process, use raking light to inspect your work. Shine a bright light at a low angle across the ceiling from multiple angles and directions. Look for any imperfections that are visible under the raking light. If you find any, sand them down and re-skim coat the area as needed. Addressing these imperfections before painting will ensure a smooth, flawless finish that will last for years to come. This is a crucial step for achieving a professional look, especially in well-lit areas of homes in neighborhoods like Yorkville or Forest Hill.
Tip 14: Prime Before Painting
Never paint directly on new skim coat. Primer seals the compound, provides uniform porosity, and ensures paint adhesion and consistent sheen. Use a quality PVA drywall primer or a dedicated ceiling primer. Roll primer in the same direction as the final skim coat.
Priming is an essential step before painting any surface, especially new drywall or skim coat. Primer seals the surface, provides uniform porosity, and ensures proper paint adhesion. It also helps to prevent the paint from being absorbed unevenly, which can result in a blotchy or inconsistent finish.
Use a quality PVA drywall primer or a dedicated ceiling primer for best results. Apply the primer in the same direction as the final skim coat to ensure a smooth, even finish. Allow the primer to dry completely before painting.
Tip 15: Use Ceiling-Specific Paint
Ceiling paint is formulated to minimize drips, spatter, and roller marks. It typically has a very flat sheen to hide imperfections and reduce glare. Do not use wall paint on ceilings. Invest in a high-quality ceiling paint for best results.
Ceiling paint is specifically formulated for use on ceilings. It typically has a thicker consistency than wall paint, which helps to minimize drips, spatter, and roller marks. It also has a very flat sheen, which helps to hide imperfections and reduce glare.
Using wall paint on ceilings can result in a less-than-desirable finish. Wall paint is often thinner and has a higher sheen, which can accentuate imperfections and create glare. Invest in a high-quality ceiling paint for best results.
Understanding Popcorn Ceiling Removal Costs in Toronto
The cost of popcorn ceiling popcorn ceiling removal in Toronto and the GTA can vary depending on several factors:
Generally, you can expect to pay anywhere from $2 to $5 per square foot for popcorn ceiling removal in Toronto. This range includes asbestos testing, removal (if necessary), skim coating, and painting. Always get multiple quotes from reputable contractors to ensure you're getting a fair price. Be wary of extremely low bids, as they may indicate subpar workmanship or hidden fees.
DIY vs. Hiring a Professional: Which is Right for You?
Deciding whether to tackle popcorn ceiling removal yourself or hire a professional depends on your skills, budget, and tolerance for mess.
DIY Advantages:
DIY Disadvantages:
Professional Advantages:
Professional Disadvantages:
If you're comfortable with DIY projects and are confident in your skills, removing popcorn ceilings yourself can be a rewarding experience. However, if you're unsure about any aspect of the process or if asbestos is present, hiring a professional is the best option.
Choosing the Right Contractor in Toronto
Finding a reliable and trustworthy contractor for popcorn ceiling removal in Toronto is crucial for ensuring a successful project. Here are some tips for choosing the right contractor:
Don't be afraid to ask questions and address any concerns you may have before hiring a contractor. A reputable contractor will be happy to answer your questions and provide you with all the information you need to make an informed decision. Consider checking contractors who have worked in your area, for example, contractors familiar with older homes in areas like High Park or The Annex.
How to Prepare Your Home for Popcorn Ceiling Removal
Proper preparation is essential for minimizing the mess and disruption caused by popcorn ceiling removal. Here's a checklist to help you prepare your home:
Taking these steps will help to protect your home and minimize the amount of cleaning required after the project is complete.
Frequently Asked Questions
How long does popcorn ceiling removal take?
The duration of popcorn ceiling removal depends on the size of the room, the complexity of the project, and whether or not asbestos is present. A small room can typically be completed in one to two days, while a larger room may take three to five days. Asbestos abatement can add several days to the project.
Is popcorn ceiling removal messy?
Yes, popcorn ceiling removal is a messy process. It generates a lot of dust and debris, which can spread throughout your home if proper precautions are not taken. However, with proper preparation and containment, the mess can be minimized.
Can I live in my home during popcorn ceiling removal?
It's generally not recommended to live in your home during popcorn ceiling removal, especially if asbestos is present. The dust and debris generated during the process can be irritating to the respiratory system and can pose a health risks of popcorn ceilings if asbestos fibers are inhaled. If you must stay in your home, make sure to seal off the work area and take extra precautions to protect yourself and your family.
What are the alternatives to popcorn ceiling removal?
If you're not interested in removing your popcorn ceiling, you have a few alternatives:
Each of these alternatives has its own advantages and disadvantages, so it's important to weigh your options carefully before making a decision.
Ready to say goodbye to your outdated popcorn ceiling? Contact us today for a free consultation and estimate. We serve Toronto, Mississauga, Brampton, Vaughan, and the entire Greater Toronto Area. Call 289-806-1616 to schedule your appointment.