Popcorn Ceiling Removal in Bloor West Village
Are you tired of the outdated popcorn ceiling in your home? If you’re considering popcorn ceiling removal in Bloor West Village, you’re not alone. Many homeowners in this vibrant Toronto neighborhood are opting to upgrade their interiors by removing this textured ceiling finish. In this comprehensive guide, we’ll explore the benefits, process, costs, and important considerations involved in popcorn ceiling removal in Bloor West Village, ensuring you have all the information you need for a successful project.
Why Remove Popcorn Ceilings?
Popcorn ceilings, also known as acoustic ceiling removals, were popular in the mid-20th century for their ability to hide imperfections and reduce noise. However, they have fallen out of favor for various reasons:
Beyond these core reasons, let's delve deeper into the specific advantages of removing that outdated popcorn ceiling. Think about how the light interacts with the texture. Popcorn ceilings often cast shadows and create a dim, less inviting atmosphere. A smooth ceiling, on the other hand, reflects light beautifully, making your rooms feel brighter, larger, and more welcoming. This is especially beneficial in Toronto homes, where natural light can be limited during the winter months.
Furthermore, consider the impact on your home's resale value. While a well-maintained home is always a plus, popcorn ceilings can be a significant deterrent for potential buyers. Removing them can instantly modernize your property and increase its appeal in the competitive Toronto real estate market, particularly in desirable neighborhoods like Roncesvalles Village or High Park.
Understanding the Removal Process
The process of popcorn ceiling removal involves several steps, each requiring careful execution to ensure a safe and effective transformation of your space.
Step 1: Assessment
Before starting the removal process, it’s essential to assess the ceiling's condition. This includes:
The asbestos testing in Toronto is paramount. In areas like The Junction, where many popcorn ceilings in older homess exist, asbestos is a common concern. A professional asbestos testing service will take samples and analyze them in a lab. If asbestos is present, you'll need a certified asbestos abatement company to safely remove the ceiling before any other work can begin. This is not a DIY project!
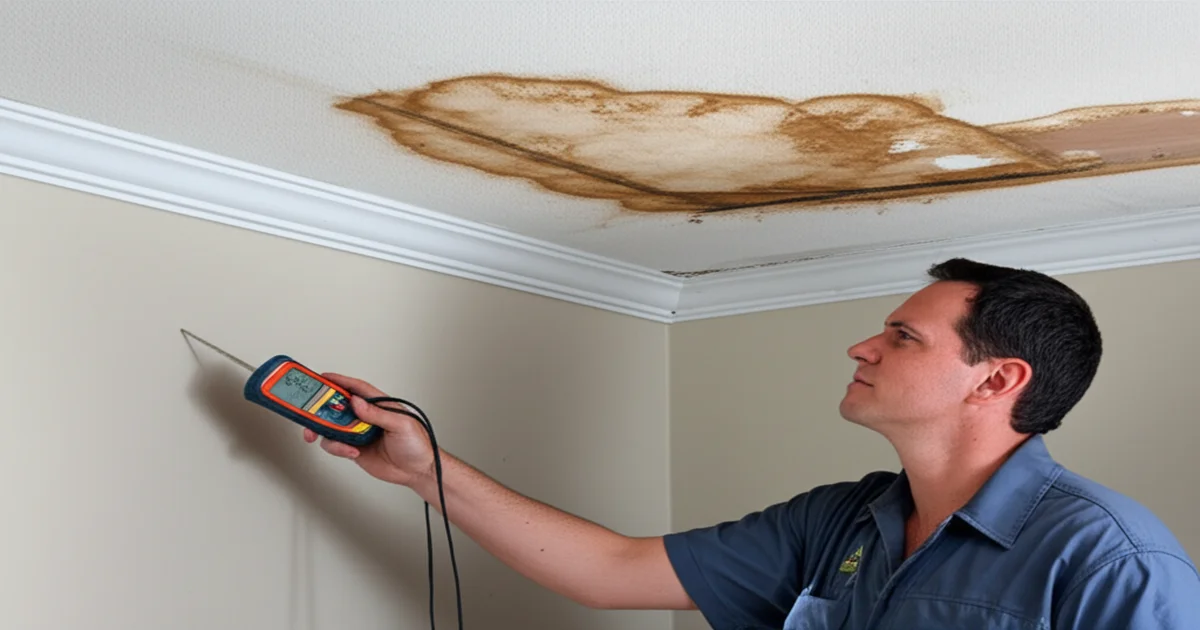
When evaluating moisture damage, pay close attention to areas around light fixtures, vents, and corners. Water stains can indicate leaks from the roof or plumbing, which need to be addressed before you invest in ceiling removal and refinishing. Ignoring these issues can lead to mold growth and further structural damage down the line.
Step 2: Preparation
Proper preparation is key to a successful ceiling removal project. This includes:
Preparation is not just about protecting your belongings; it's also about creating a safe and efficient workspace. Use painter's tape to securely attach plastic sheeting to walls and trim. Overlap the edges to prevent dust and debris from seeping through. Consider using heavier-duty drop cloths for floors, as they can withstand more wear and tear.
Don't forget to remove or cover any sensitive electronics in adjacent rooms, as dust can travel easily. Seal doorways with plastic sheeting and tape to contain the mess as much as possible. Proper ventilation is also crucial, so open windows (weather permitting) and consider using a fan to circulate air.
Step 3: Removal
The actual removal process can be done in a few different ways, depending on your preference and the condition of the ceiling:
The wet method is generally preferred because it significantly reduces dust, which is a major concern for many homeowners in densely populated areas like Little Italy. Use a garden sprayer or a pump sprayer to evenly dampen the ceiling. Avoid over-saturating the ceiling, as this can damage the drywall underneath. Let the water soak in for about 15-20 minutes before you start scraping.
Use a wide, flexible scraper with a comfortable handle. Apply gentle, even pressure to avoid gouging the drywall. Work in small sections, overlapping each pass to ensure complete removal. Have a large container nearby to collect the scraped material.
The dry method is less common but may be necessary if the ceiling has already been painted or sealed. In this case, wear a high-quality respirator mask to protect yourself from dust inhalation. Work slowly and carefully to minimize dust and avoid damaging the drywall.
Step 4: Finishing Touches
After the popcorn ceiling has been removed, it's important to take care of the finishing touches to ensure a smooth and polished look. This includes:
Repairing any damage is crucial for achieving a professional-looking result. Use drywall compound to fill any gouges, cracks, or imperfections. Apply the compound in thin layers, allowing each layer to dry completely before sanding. Use a sanding sponge or a sanding pole with fine-grit sandpaper to smooth the surface.
Sanding is essential for creating a smooth, even surface for painting. Use a light touch to avoid damaging the drywall. Wipe down the ceiling with a damp cloth to remove any dust before painting.
When choosing paint, opt for a high-quality primer and paint specifically designed for ceilings. A flat or matte finish is generally preferred, as it helps to hide imperfections. Apply two coats of paint for optimal coverage and durability. Consider using a paint with mold and mildew resistance, especially in bathrooms and kitchens.
If you're looking for inspiration, check out the latest interior design trends in areas like Queen West, known for its innovative and stylish homes.
Cost of Popcorn Ceiling Removal
The cost of popcorn ceiling removal in Bloor West Village can vary based on several factors, including:
Beyond these factors, consider the cost of materials, such as plastic sheeting, drop cloths, scrapers, drywall compound, sandpaper, primer, and paint. If you're hiring a professional, be sure to get a detailed quote that includes all of these costs.
Asbestos remediation can significantly increase the overall cost of the project. The price will depend on the amount of asbestos present and the complexity of the removal process. It's essential to hire a certified asbestos abatement company to ensure the work is done safely and in compliance with all regulations.
Labor costs can also vary depending on the experience and expertise of the contractor. It's worth getting multiple quotes from different contractors to compare prices and services. Be sure to check their references and read online reviews before making a decision.
For a precise estimate, it's best to contact a local expert. If you need assistance, don’t hesitate to call us at 289-806-1616 for a free consultation. We service all of the GTA, from Mississauga to Scarborough and beyond.
Additional Considerations for Toronto Homeowners
Removing a popcorn ceiling in Toronto presents unique challenges and opportunities. Here are some additional factors to consider:
Consider exploring options beyond just a smooth, painted ceiling. You could install pot lights to enhance the lighting in your space, or add crown molding for a touch of elegance. Another popular option is to install a textured ceiling, but with a more modern and sophisticated finish than popcorn. Check out our guide to modern ceiling designs for inspiration.
Why Choose a Professional for Popcorn Ceiling Removal?
While DIY popcorn ceiling removal is possible, there are several compelling reasons to hire a professional:
When choosing a professional, be sure to ask for references, check their online reviews, and verify their insurance and licensing. A reputable contractor will be happy to answer your questions and provide you with a detailed quote.
How to Find a Reputable Contractor in the GTA
Finding a reliable and trustworthy contractor in the Greater Toronto Area can be challenging, but here are some tips to help you find the right one:
Remember to check if they are familiar with local building codes and regulations specific to areas like North York or Etobicoke.
Frequently Asked Questions (FAQ)
What is the best time to remove a popcorn ceiling?
The best time to remove a popcorn ceiling is during a home renovation or when you are planning to repaint. This allows you to seamlessly integrate the project into your overall home improvement plans. Ideally, schedule it before you install new flooring or furniture to minimize disruption.
Can I remove the popcorn ceiling myself?
While DIY removal is possible, it can be labor-intensive and messy. Hiring a professional is often recommended, especially if there is a risk of asbestos. If you decide to tackle it yourself, ensure you follow all safety precautions. At minimum, wear a properly fitted N95 mask.
How long does the removal process take?
The duration of the popcorn ceiling removal process depends on the size of the area and the method used. Typically, it can take anywhere from a few hours to a couple of days. For a more accurate timeline, consult with a professional. A small bathroom might take a few hours, while a large living room could take a full day or more.
What should I do if my popcorn ceiling contains asbestos?
If you suspect your popcorn ceiling contains asbestos, do not attempt to remove it yourself. Contact a certified asbestos removal professional to handle the situation safely. They will have the necessary training, equipment, and permits to safely remove and dispose of the asbestos-containing material.
How can I prepare my home for popcorn ceiling removal?
To how to prepare for removal ceiling removal, clear the room of furniture, cover floors and walls with protective sheeting, and turn off electricity to any ceiling fixtures. This will help minimize mess and ensure safety during the process. Consider removing window coverings as well.
For further information on home improvement projects, check out our article on home renovation tips and learn how to enhance your living space effectively. You might also find our guide to drywall repair helpful after the popcorn ceiling is removed.
If you're considering popcorn ceiling removal in Bloor West Village, don’t hesitate to reach out. Call us at 289-806-1616 to discuss your project and receive expert advice tailored to your needs. Your dream home is just a ceiling away! We offer free, no-obligation quotes and are happy to answer any questions you may have. Let us help you transform your space!