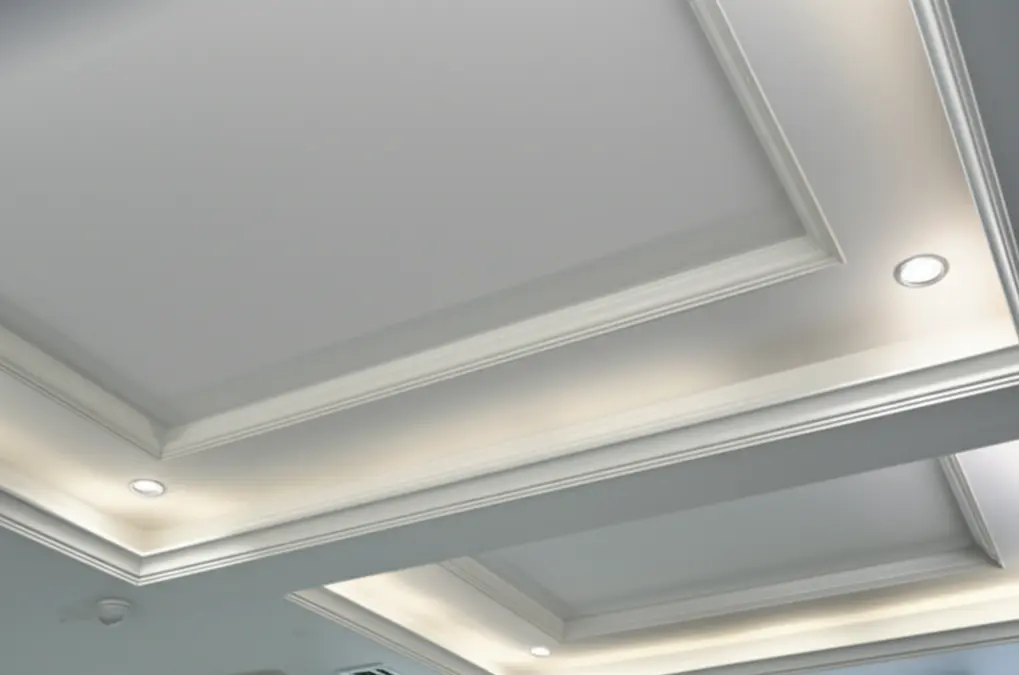
Popcorn Ceiling Removal with Crown Molding: A Comprehensive Guide
If you're considering popcorn ceiling removal with crown molding, you're not alone. Many homeowners in the Greater Toronto Area (GTA) are looking to modernize their spaces by replacing outdated popcorn ceilings with a sleek, polished finish combined with elegant crown molding. This guide will walk you through the process, costs, and tips for a successful renovation.
Understanding Popcorn Ceilings
Popcorn ceilings, also known as acoustic ceiling removals, became popular in the mid-20th century due to their ability to hide imperfections and reduce noise. However, they have fallen out of favor in recent years as homeowners prefer smoother finishes.
Before diving into the removal process, it's essential to understand the materials used in popcorn ceilings. Many contain asbestos, especially if installed before the 1980s. If you suspect your ceiling may contain asbestos, it's crucial to hire a professional for testing and removal.
Why Combine Crown Molding with Popcorn Ceiling Removal?
Crown molding adds a touch of elegance and sophistication to any room. When combined with popcorn ceiling removal, it can enhance the overall aesthetic appeal of your home. Here are a few reasons why you should consider this combination:
The Process of Popcorn Ceiling Removal with Crown Molding
Removing a popcorn ceiling and installing crown molding is a multi-step process. Here’s a breakdown of what to expect during removal:
Step 1: Preparation
Step 2: Popcorn Ceiling Removal
Step 3: Installing Crown Molding
Cost of Popcorn Ceiling Removal with Crown Molding
The cost of popcorn ceiling removal and crown molding installation can vary significantly based on several factors, including the size of the room, the complexity of the installation, and labor costs in your area. Here’s a general breakdown:
- DIY: $0 - $100 (supplies only)
- Professional: $1 to $3 per square foot
- DIY: $1 to $5 per linear foot (materials only)
- Professional: $3 to $10 per linear foot (including labor)
For a typical 10x12 room, you might be looking at a total cost ranging from $500 to $1,500 for both popcorn ceiling removal and crown molding installation, depending on whether you choose to go the DIY route or hire professionals.
Tips for Successful Popcorn Ceiling Removal with Crown Molding
Local Regulations and Building Codes
Before starting your project, it's essential to check the Ontario Building Code and any local regulations in the GTA cities like Toronto, Mississauga, Brampton, Vaughan, Richmond Hill, Markham, Oakville, Burlington, Ajax, and Pickering. Certain municipalities may have specific requirements for ceiling modifications, especially if asbestos is involved.
Frequently Asked Questions
What is the best way to remove popcorn ceilings?
The best way to remove popcorn ceilings is to moisten the texture to loosen it before scraping it off with a drywall scraper. Always ensure you test for asbestos first.
How long does it take to remove a popcorn ceiling?
The duration for popcorn ceiling removal depends on the room's size and the extent of the texture. On average, it can take anywhere from a few hours to a couple of days for complete removal and cleanup.
Can I install crown molding myself?
Yes, you can install crown molding yourself if you have basic carpentry skills and tools. However, hiring a professional can ensure a flawless finish.
How do I choose the right crown molding?
Consider the architectural style of your home and the ceiling height. Wider moldings work well in taller rooms, while simpler designs are better suited for lower ceilings.
Is popcorn ceiling removal messy?
Yes, the removal process can be quite messy. It’s essential to cover your floors and furniture and
---
Diving Deeper: More on Understanding Popcorn Ceilings
Let’s expand on the nature of popcorn ceilings. These textured ceilings, while once fashionable, present several challenges beyond their dated appearance.
Asbestos Concerns: As previously stressed, this is paramount. Homes built before the mid-1980s (and even some slightly later) frequently used asbestos in popcorn ceilings guide applications. Asbestos fibers, when inhaled, can lead to serious respiratory illnesses, including mesothelioma and lung cancer. Never* attempt to remove a popcorn ceiling in an popcorn ceilings in older homes without professional testing. In areas like The Beaches or Rosedale in Toronto, where many older homes exist, this is especially critical.
* Repair Challenges: Popcorn ceilings are notoriously difficult to repair seamlessly. Patching damage often leaves visible imperfections, making a full removal and re-texturing or smoothing a more appealing option. Trying to match the existing texture in a High Park home, for instance, can be frustrating.
* Dust and Debris Traps: The textured surface readily collects dust, cobwebs, and other airborne particles. Cleaning can be challenging and often ineffective, contributing to poor indoor air quality.
* Impact on Lighting: The uneven surface of a popcorn ceiling can diffuse light unevenly, potentially making rooms feel darker and less inviting. A smooth ceiling reflects light more efficiently.
Expanding on the Benefits of Crown Molding
Beyond aesthetics, crown molding offers numerous advantages that make it a worthwhile addition after popcorn ceiling removal.
* Architectural Detail and Character: Crown molding adds a touch of elegance and sophistication, enhancing the architectural character of your home. It can transform a plain room into a more visually appealing space. Consider the diverse architectural styles in areas like Forest Hill or Lawrence Park; crown molding can be selected to complement these styles beautifully.
* Hiding Imperfections: Crown molding can conceal minor imperfections where the wall meets the ceiling, such as uneven joints or cracks.
* Protecting Walls: It can provide a protective barrier against scuffs and bumps along the top of walls, particularly useful in high-traffic areas.
* Creating Visual Height: Strategically chosen crown molding can create the illusion of higher ceilings, making rooms feel more spacious. This is especially beneficial in older homes in neighborhoods like Cabbagetown that may have lower ceilings.
* Variety of Styles and Materials: Crown molding is available in a wide range of styles, from simple and modern to ornate and traditional, and in various materials, including wood, MDF (medium-density fiberboard), and polyurethane. This allows you to customize the look to match your personal style and budget.
Detailed Steps for Popcorn Ceiling Removal: A Pro's Approach
Let's break down each step of the popcorn ceiling removal process with more detail, offering tips and tricks from experienced professionals in the GTA.
Step 1: Comprehensive Preparation
Step 2: Mastering Popcorn Ceiling Scraping
Step 3: Achieving a Smooth Finish
Detailed Steps for Crown Molding Installation: A Craftsman's Guide
Let's delve into the specifics of crown molding installation, ensuring a professional-looking result.
Step 1: Crown Molding Selection and Preparation
- Wood: Offers a classic look and can be stained or painted. It's more susceptible to moisture damage.
- MDF (Medium-Density Fiberboard): A cost-effective option that is easy to work with and paint. It's not suitable for damp environments.
- Polyurethane: Lightweight, moisture-resistant, and easy to install. A good choice for bathrooms and kitchens.
Step 2: Precise Measurement and Cutting
Step 3: Secure Attachment and Finishing
Addressing Asbestos Concerns in the GTA
Given the age of many homes in Toronto and surrounding areas, it’s crucial to reiterate the importance of asbestos testing in Toronto.
* Professional Testing is Key: Do not attempt to test for asbestos yourself. Hire a certified asbestos testing company. They will collect samples and send them to a laboratory for analysis.
Certified Abatement Companies: If asbestos is present, you must* hire a certified asbestos abatement company to remove it safely. These companies have the training, equipment, and experience to handle asbestos properly and dispose of it according to regulations.
* Regulations in Ontario: Familiarize yourself with the regulations regarding asbestos removal in Ontario. These regulations are designed to protect workers and the public from exposure to asbestos fibers.
* Due Diligence: When hiring a contractor for popcorn ceiling removal, ask about their experience with asbestos and their procedures for handling it safely. Check their credentials and references.
* Neighbourhood Considerations: Consider the impact on your neighbours, especially in densely populated areas like downtown Toronto. Asbestos removal can generate dust and noise, so it's important to communicate with your neighbours and take steps to minimize disruption.
Choosing the Right Professionals in Toronto and the GTA
Selecting the right contractor for your popcorn ceiling removal and crown molding installation is crucial for a successful project.
* Get Multiple Quotes: Obtain quotes from at least three different contractors. This will allow you to compare prices and services.
* Check References: Ask for references from previous clients and contact them to inquire about their experience.
* Review Online Reviews: Check online review sites such as Google Reviews, Yelp, and HomeStars to see what other customers have said about the contractor.
* Verify Insurance and Licensing: Ensure that the contractor is properly licensed and insured. This will protect you in case of accidents or damage.
* Detailed Contract: Get a detailed contract that outlines the scope of work, materials, costs, and timeline.
* Communication: Choose a contractor who is responsive, communicative, and willing to answer your questions.
* Local Expertise: Prioritize contractors with experience working in your specific neighbourhood. They'll be familiar with local building codes and common issues in the area. For example, a contractor experienced in dealing with older homes in areas like Roncesvalles Village will be better equipped to handle potential challenges.
Frequently Asked Questions
How can I tell if my popcorn ceiling contains asbestos?
The only way to know for sure if your popcorn ceiling contains asbestos is to have it tested by a certified asbestos testing company. Visual inspection is not reliable. Consider professional testing.
What are the health risks associated with asbestos exposure?
Exposure to asbestos fibers can lead to serious respiratory illnesses, including mesothelioma, lung cancer, and asbestosis. There is no safe level of asbestos exposure.
Can I remove a popcorn ceiling myself if it doesn't contain asbestos?
While it's possible to remove a popcorn ceiling yourself if it doesn't contain asbestos, it's a messy and labor-intensive process. Hiring a professional can save you time, effort, and potential headaches. Learn about our professional services.
How much does it cost to skim coat a ceiling after popcorn ceiling removal?
The cost of skim coating a ceiling can vary depending on the size of the room and the extent of the damage. In the GTA, you can typically expect to pay between $2 and $5 per square foot for skim coating.
What type of paint should I use on my ceiling after popcorn ceiling removal and crown molding installation?
Use a high-quality, flat or matte paint specifically designed for ceilings. Flat paint helps to minimize imperfections and create a uniform finish.
Contact us today at 1-289-806-1616 for a free consultation and estimate on your popcorn ceiling removal and crown molding installation project!