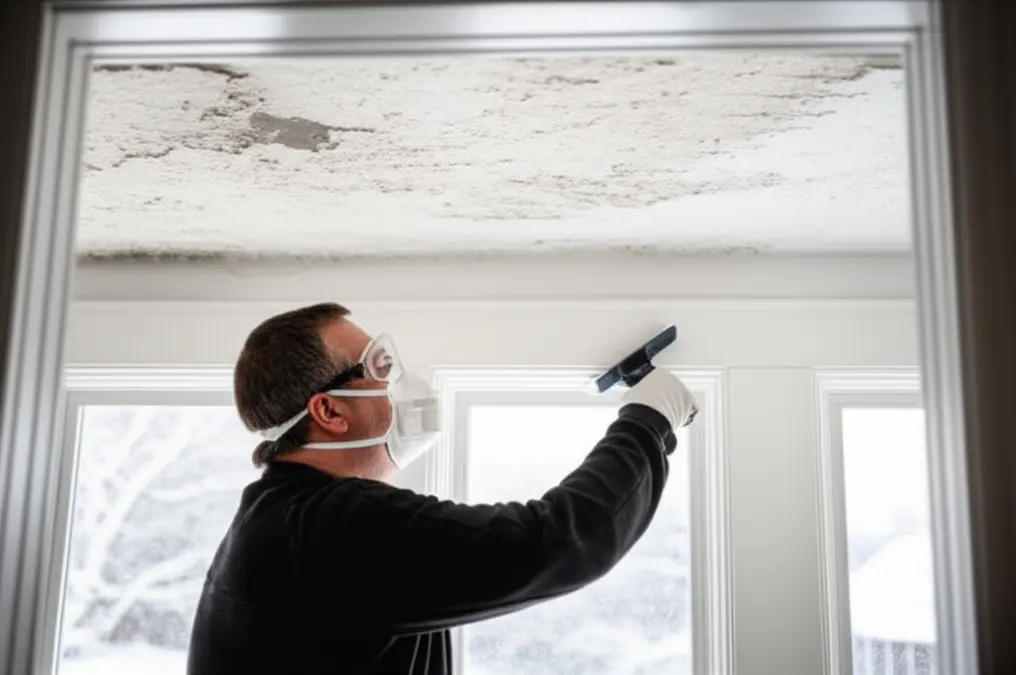
# Popcorn Ceiling Removal Winter Tips: Essential Advice for Homeowners
If you’re considering popcorn ceiling removal this winter, you’re not alone. Many homeowners in the Greater Toronto Area (GTA) are opting for this renovation to modernize their homes and improve indoor air quality. However, winter can present unique challenges for this type of project. In this guide, we’ll share essential popcorn ceiling removal winter tips to help you navigate the process effectively.
Why Remove Popcorn Ceilings?
Popcorn ceilings, once a popular choice for their acoustic properties and ease of installation, are now often viewed as outdated. The removal can:
For more information on the benefits of home renovations, check out our article on home improvement tips.
Preparing for Winter Ceiling Renovation
Winter ceiling renovation requires specific preparations to ensure a successful project. Here are some essential popcorn ceiling removal winter tips to take into account:
- Protective gear (gloves, goggles, masks)
- Scraper or putty knife
- Spray bottle with water
- Ladder
- Drop cloths to protect furniture and flooring
- Primer and paint for the newly exposed ceiling
Step-by-Step Guide to Popcorn Ceiling Removal
Removing a popcorn ceiling can be a DIY project, but for best results, consider hiring professionals. If you choose to go the DIY route, follow these steps:
Cost of Popcorn Ceiling Removal in Winter
The cost of popcorn ceiling removal in winter can vary based on several factors, including the size of the space, the condition of the ceiling, and whether you choose to do it yourself or hire professionals. On average, homeowners can expect to pay between $1 to $3 per square foot for removal. However, if you encounter asbestos, the costs can significantly increase due to the need for specialized removal services.
When budgeting for your project, consider additional costs for materials such as primer and paint, as well as any repairs that may be necessary after the removal process. For a detailed breakdown of costs and considerations, visit our page on home renovation costs.
Understanding the Challenges of Winter Popcorn Ceiling Removal in the GTA
Winter in Toronto and the GTA presents unique challenges for popcorn ceiling removal that homeowners must consider.
Humidity Levels
One of the biggest issues is the fluctuating humidity levels. While winter air is generally drier, indoor heating can create pockets of humidity, especially in popcorn ceilings in older homess in areas like High Park or Leslieville. This can affect the drying time of joint compound, primer, and paint. Using a dehumidifier can help regulate the moisture levels in the room and speed up the drying process.
Heating Costs
Maintaining a consistent temperature is crucial, but it can also increase your heating bill. Consider insulating the room you're working in with plastic sheeting to minimize heat loss. You might also want to temporarily adjust your thermostat to focus heating on the work area.
Limited Ventilation
While ventilation is important, opening windows in the dead of winter can lead to significant heat loss and discomfort. Use fans to circulate air without opening windows too wide. A good quality air purifier can also help remove dust and particles from the air.
Material Storage
Storing materials in a cold garage or shed can affect their performance. Bring materials like primer and paint indoors at least 24 hours before use to allow them to acclimate to room temperature.
DIY vs. Professional Popcorn Ceiling Removal: Which is Right for You?
Deciding whether to tackle popcorn ceiling removal yourself or hire a professional depends on several factors, including your budget, skill level, and comfort with potential risks like asbestos exposure.
DIY Considerations
Pros:
Cons:
Professional Considerations
Pros:
Cons:
For homeowners in areas like Scarborough or North York, finding a local and reputable professional is key. Look for companies with good reviews, proper licensing, and insurance.
Detailed Supply List for DIY Popcorn Ceiling Removal
If you decide to go the DIY route, make sure you have all the necessary supplies on hand before you begin. Here's a comprehensive list:
- Respirator Mask: Essential to protect your lungs from dust and potential asbestos fibers.
- Goggles: To protect your eyes from debris.
- Gloves: To protect your hands from chemicals and sharp edges.
- Coveralls: To protect your clothing from dust and paint.
- Scraper: A wide, flat scraper is ideal for removing the popcorn texture. Look for one with a comfortable handle.
- Spray Bottle: For wetting the ceiling.
- Ladder: A sturdy ladder that allows you to reach the ceiling comfortably.
- Joint Knife: For applying joint compound to repair any damage.
- Sanding Pole with Sandpaper: For smoothing out the repaired areas.
- Drop Cloths: Plastic or canvas drop cloths to protect your floors and furniture.
- Painter's Tape: To secure the drop cloths and protect trim.
- Joint Compound: For repairing any holes or imperfections in the drywall.
- Primer: To prepare the ceiling for painting.
- Paint: Choose a high-quality paint that is suitable for ceilings.
- HEPA Vacuum: For cleaning up dust and debris.
- Dehumidifier: To help control humidity levels and speed up drying time.
- Work Lights: To provide adequate lighting in the work area.
Advanced Techniques for Popcorn Ceiling Removal
Beyond the basic steps, there are some advanced techniques that can help you achieve better results and minimize damage.
Scoring the Ceiling
Before wetting the ceiling, use a utility knife to score it in a grid pattern. This helps the water penetrate the popcorn texture more evenly, making it easier to scrape off.
Using a Texture Scraper
Instead of a standard scraper, consider using a texture scraper specifically designed for popcorn ceilings. These scrapers have a wider blade and a more ergonomic handle, which can reduce fatigue.
Hot Water vs. Cold Water
Some people find that using hot water in the spray bottle helps to soften the popcorn texture more effectively. However, be careful not to use water that is too hot, as it could damage the drywall.
Checking for Lead Paint
If your home was built before 1978, there's a possibility that the paint on the ceiling contains lead. Use a lead test kit to check for lead before you begin scraping. If lead is present, it's best to hire a professional to remove the ceiling safely.
Dealing with Stubborn Areas
Some areas of the popcorn ceiling may be more difficult to remove than others. Try re-wetting these areas and letting them soak for a longer period of time. You can also use a heat gun to soften the texture, but be careful not to overheat the drywall.
Modern Ceiling Alternatives to Popcorn Ceilings
Once you've removed the popcorn ceiling, you'll want to choose a modern alternative that will enhance the look of your home. Here are a few popular options:
Consider the overall style of your home when choosing a ceiling finish. A smooth finish is a good choice for modern homes, while a textured finish might be more appropriate for traditional homes. If you are looking for ceiling removal and drywall installation in areas such as Mississauga or Brampton, be sure to find a reputable local contractor.
The Importance of Asbestos Testing in Toronto
Before you start any popcorn ceiling removal project in Toronto, especially in older homes in neighbourhoods like Cabbagetown or The Annex, it's crucial to have the ceiling tested for asbestos. Asbestos was commonly used in building materials before 1980, and exposure to asbestos fibers can cause serious health problems, including lung cancer and mesothelioma.
How to Get Your Ceiling Tested
You can hire a professional asbestos testing in Toronto company to collect a sample of your ceiling and have it analyzed in a laboratory. The cost of testing typically ranges from $50 to $100 per sample.
What to Do If Asbestos is Present
If asbestos is present in your popcorn ceiling, it's essential to hire a qualified asbestos abatement contractor to remove it safely. Do not attempt to remove asbestos-containing materials yourself. Asbestos abatement contractors have the training, equipment, and experience to remove asbestos safely and in compliance with all regulations.
Regulations and Permits
In Ontario, asbestos removal is regulated by the Ministry of Labour. You may need to obtain a permit before starting an asbestos removal project. Your asbestos abatement contractor can help you navigate the permit process.
Winterizing Your Home After Popcorn Ceiling Removal
Once the popcorn ceiling is removed and the new ceiling finish is in place, take some time to winterize your home to ensure it's warm and energy-efficient.
Frequently Asked Questions
What are the risks of removing popcorn ceilings?
Removing popcorn ceilings can expose you to asbestos if your ceiling was installed before 1980. It’s essential to have your ceiling tested before proceeding with removal. If asbestos is present, hiring a professional is necessary to ensure safe removal. There is also the risk of damaging the drywall underneath if you are not careful.
Can I remove popcorn ceilings in the winter?
Yes, you can remove popcorn ceilings in winter, but it’s essential to follow specific popcorn ceiling removal winter tips, such as maintaining a comfortable indoor temperature and ensuring proper ventilation. Consider the challenges of fluctuating humidity and material storage as well.
How long does it take to remove a popcorn ceiling?
The time it takes to remove a popcorn ceiling depends on the size of the room and your experience level. A small room may take a few hours, while larger spaces could take a day or more, especially if repairs and painting are included. Be sure to factor in prep and cleanup time as well.
What is the best way to dispose of popcorn ceiling debris?
Popcorn ceiling debris should be disposed of properly, especially if it contains asbestos. Contact your local waste management facility for information on how to dispose of asbestos-containing materials. If you hire a professional, they will handle the disposal for you.
Conclusion
With the right preparation and understanding of the process, popcorn ceiling removal can be a manageable winter project. Remember to consider the unique challenges that winter presents and follow our popcorn ceiling removal winter tips for a successful renovation. Whether you're in downtown Toronto or a suburb like Vaughan, proper planning is key. If you have questions or need assistance, don’t hesitate to reach out.
For professional help with popcorn ceiling removal, call us at 289-806-1616. We’re here to assist you with all your home renovation needs!