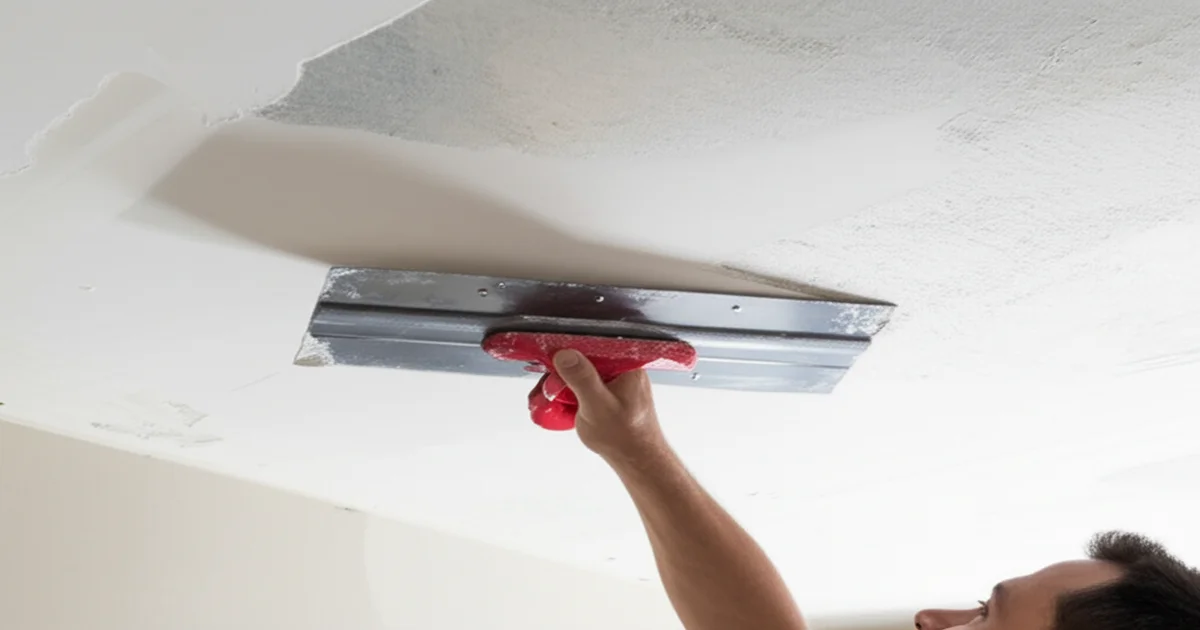
Breaking Down Popcorn Ceiling Removal Cost Per Room
Understanding popcorn ceiling removal cost per room helps GTA homeowners budget accurately for this popular home improvement. Rather than committing to a whole-house project, many Toronto, Mississauga, Brampton, and Vaughan homeowners prefer to tackle one room removal time at a time. This detailed breakdown gives you the specific numbers needed to plan your popcorn ceiling removal project room by room.
Whether starting with the living room, updating bedrooms, or modernizing your entire home in phases, knowing per-room costs allows you to prioritize based on budget and impact. The rooms you use most and those most visible to guests typically offer the best return on investment.
---
📚 Related Guides
[Complete Guide to Popcorn Ceiling Removal](/blog/popcorn-ceiling-removal-guide-toronto) — Our comprehensive pillar guide[Popcorn Ceiling Removal Cost Guide](/blog/popcorn-ceiling-removal-cost-guide) — Our comprehensive pillar guideCall 289-806-1616 for a free room-by-room estimate on popcorn ceiling removal.
Average Cost by Room Type
Living Room / Great Room
Typical size — : 200–400 square feetRemoval cost — : $500–$1,800With finishing — : $800–$2,800With painting — : $1,000–$3,400Notes — : Often the largest room; may have [vaulted ceiling removal](/blog/vaulted-ceiling-popcorn-removal)s; most visible roomMaster Bedroom
Typical size — : 150–250 square feetRemoval cost — : $375–$1,125With finishing — : $600–$1,750With painting — : $750–$2,100Notes — : Walk-in closet ceiling may also need attention; tray ceilings add complexityStandard Bedroom
Typical size — : 100–150 square feetRemoval cost — : $250–$675With finishing — : $400–$1,050With painting — : $500–$1,250Notes — : Most affordable per-room optionKitchen
Typical size — : 100–200 square feetRemoval cost — : $250–$900With finishing — : $400–$1,400With painting — : $500–$1,700Notes — : Grease residue on popcorn texture; exhaust fans and fixtures need careful handlingDining Room
Typical size — : 120–180 square feetRemoval cost — : $300–$810With finishing — : $480–$1,260With painting — : $600–$1,500Notes — : Chandelier removal and reinstallation; crown moulding integrationBathroom
Typical size — : 40–80 square feetRemoval cost — : $150–$360With finishing — : $200–$500With painting — : $250–$600Notes — : Moisture-resistant finishing products required; smallest and cheapest roomHallway
Typical size — : 50–100 square feetRemoval cost — : $125–$450With finishing — : $200–$700With painting — : $250–$850Notes — : Narrow spaces; high visibility; transitions between roomsBasement
Typical size — : 400–800 square feetRemoval cost — : $1,000–$3,600With finishing — : $1,600–$5,600With painting — : $2,000–$6,800Notes — : Lower ceilings; moisture concerns; ductwork and pipes to work aroundFactors That Affect Per-Room Costs
Ceiling Height — Standard 8-foot ceilings are baseline. Each additional foot adds roughly 10-15% due to scaffolding and slower pace.
Asbestos Presence — Pre-1990 homes testing positive approximately double the cost. Ontario Building Code requires certified abatement. Testing costs $200–$400. Learn about asbestos in popcorn ceilings.
Ceiling Condition — water damaged ceiling repair, cracks, previous repairs, or multiple paint layers increase difficulty and cost by 20-30%.
Fixtures and Obstacles — Rooms with numerous ceiling fixtures, fans, speakers, and recessed lights require more preparation.
Finishing Level — Basic smooth costs less than Level 5 finishing. Orange peel or knockdown are mid-range. See our ceiling texture options.
Accessibility — Rooms with built-in furniture or challenging layouts cost more.
Room-by-Room Priority Guide
Phase 1: High-Impact Rooms ($1,500–$4,000) — Living room, dining room, kitchen
Phase 2: Personal Spaces ($1,000–$3,000) — Master bedroom and bathroom
Phase 3: Remaining Rooms ($1,500–$4,000) — Secondary bedrooms, hallways, additional bathrooms
Phase 4: Bonus Areas ($1,500–$5,000) — Basement, home office, recreation areas
Whole-House vs. Per-Room Pricing
While per-room pricing provides flexibility, whole-house projects offer better value:
Room-by-room (over time) — : $6,000–$12,000 total ($4.00–$8.00/sq ft)Whole house (single project) — : $4,500–$9,000 ($3.00–$6.00/sq ft)Savings with whole house — : $1,500–$3,000 (20-25%)Savings come from reduced mobilization, efficient workflow, and volume materials pricing. See our popcorn ceiling removal cost guide.
Call 289-806-1616 for a customized room-by-room quote. We help you prioritize based on budget and goals.
Frequently Asked Questions
What is the cheapest room to remove popcorn ceiling from?
Bathrooms are typically least expensive at $150–$600 including finishing. Their small size makes them an excellent starting point.
Can I remove popcorn from just one room?
Absolutely. We accommodate single-room projects regularly. There is typically a minimum charge of $400–$600 to cover setup and mobilization.
Is there a minimum charge for popcorn ceiling removal?
Most professional companies charge a minimum of $400–$600 regardless of room size, covering travel, setup, materials, and cleanup.
How much does it cost to remove popcorn ceiling in a condo?
GTA condo units with 600–1,000 sq ft of ceiling cost $1,800–$4,500 for standard removal, or $3,600–$8,000 with asbestos. Condos may have additional logistics including building access and noise restrictions.
Should I do all rooms at once or in phases?
Both are valid. Whole-house saves 20-25% but requires larger investment and 3-5 days disruption. Phased approaches spread cost and disruption. Many start with living room and kitchen, then complete bedrooms later.
Does the per-room cost include painting?
Not always. Our estimates clearly itemize each component. Some homeowners paint themselves to save costs, while others prefer our complete service.
Diving Deeper: Breaking Down the Costs Further
While the above provides a general overview, let’s delve deeper into the specific cost drivers for each room type and the various factors influencing the final price. Understanding these nuances can help you make informed decisions and potentially save money on your popcorn ceiling removal project.
Living Room/Great Room: The Focal Point
The living room, often the largest and most visible space in your Toronto home, naturally commands a higher price for popcorn ceiling removal.
Size Matters: — Larger square footage directly translates to more labor and materials.Vaulted Ceilings: — These architectural features, popular in areas like Oakville and Richmond Hill, require specialized equipment and expertise, increasing costs significantly.Accessibility: — Large furniture, intricate layouts, and delicate décor necessitate careful preparation and protection, adding to the overall expense.Lighting Fixtures: — Complex lighting systems, including pot lights, chandeliers, and ceiling fans, require meticulous removal and reinstallation.Finishing Touches: — Opting for a smooth, modern finish will add to the cost, but it can dramatically transform the look and feel of your living space. Consider the benefits of a [smooth ceiling finish](/blog/popcorn-ceiling-vs-smooth-ceiling).Master Bedroom: Your Personal Retreat
The master bedroom, your personal sanctuary, requires careful attention to detail during popcorn ceiling removal.
Walk-in Closets: — Don't forget to factor in the cost of removing the popcorn ceiling from your walk-in closet, which is often an extension of the master bedroom.Tray Ceilings: — These decorative ceiling features, common in newer homes in areas like Aurora and Newmarket, add complexity and cost to the project.Furniture Protection: — Protecting your valuable bedroom furniture is paramount. Our team takes extra precautions to ensure everything is properly covered and protected.Quiet Hours: — We understand the importance of respecting your privacy and minimizing disruption during the removal process, especially in residential areas.Standard Bedrooms: Affordable Updates
Standard bedrooms offer the most affordable per-room option for popcorn ceiling removal.
Smaller Square Footage: — Reduced size translates to less labor and materials, making these rooms a budget-friendly starting point.Simplified Fixtures: — Typically, standard bedrooms have fewer and simpler lighting fixtures compared to living rooms or kitchens.Minimal Obstacles: — Often, these rooms have less furniture and fewer architectural complexities, making the removal process more straightforward.Kitchen: A Challenging Space
The kitchen presents unique challenges due to grease buildup and numerous fixtures.
Grease Residue: — Years of cooking can leave a sticky residue on the popcorn texture, making removal more difficult and time-consuming.Exhaust Fans and Fixtures: — Kitchens typically have multiple light fixtures, exhaust fans, and potentially even sprinkler systems that require careful handling.Cabinet Protection: — Protecting your kitchen cabinets from dust and debris is essential. We use specialized techniques to minimize mess and prevent damage.Appliance Considerations: — Large appliances, such as refrigerators and stoves, may need to be moved or protected during the removal process.Dining Room: Elegance and Precision
The dining room, often a focal point for entertaining, requires a meticulous approach to popcorn ceiling removal.
Chandelier Removal and Reinstallation: — Chandeliers are delicate and require specialized knowledge to remove and reinstall safely.Crown Moulding Integration: — Integrating the new ceiling finish with existing crown moulding requires precision and attention to detail.Furniture Protection: — Protecting your dining room table, chairs, and other valuable furniture is crucial.Formal Setting: — We understand the importance of maintaining a clean and respectful environment in your dining room.Bathroom: Small but Sensitive
Bathrooms, despite their small size, require specific considerations due to moisture and ventilation.
Moisture-Resistant Finishing Products: — Using moisture-resistant drywall compound and paint is essential to prevent mold and mildew growth.Ventilation Systems: — Bathrooms often have ventilation fans that need to be carefully removed and reinstalled.Tight Spaces: — Working in confined spaces requires specialized techniques and equipment.Plumbing Considerations: — We take extra care to avoid damaging any plumbing fixtures or pipes during the removal process.Hallway: Transition Zones
Hallways, often overlooked, play a crucial role in the overall aesthetic of your home.
Narrow Spaces: — Working in narrow hallways can be challenging, requiring specialized equipment and techniques.High Visibility: — Hallways are highly visible areas, so a smooth and flawless finish is essential.Transitions Between Rooms: — Ensuring a seamless transition between rooms with different ceiling finishes requires careful planning and execution.Basement: A Blank Canvas
Basements, often large and unfinished, offer a unique opportunity to transform your living space.
Lower Ceilings: — Lower ceilings can make the removal process more challenging, requiring specialized equipment and techniques.Moisture Concerns: — Basements are prone to moisture problems, so addressing any existing leaks or dampness is essential before starting the removal process.Ductwork and Pipes: — Basements often have exposed ductwork and pipes that need to be carefully worked around.Insulation Considerations: — Depending on the age and construction of your home, your [basement ceiling removal](/blog/popcorn-ceiling-removal-basement) may contain insulation that needs to be addressed during the removal process.The DIY Dilemma: Is Removing Popcorn Ceiling Yourself Worth It?
While DIY projects can be tempting to save money, popcorn ceiling removal is often best left to professionals. Consider these factors before tackling it yourself:
Asbestos Risk: — Disturbing asbestos-containing materials can be hazardous to your health. Professional testing and abatement are crucial.Time and Effort: — Popcorn ceiling removal is a labor-intensive and time-consuming process.Skill and Experience: — Achieving a smooth and professional finish requires specialized skills and experience.Dust and Debris: — The removal process generates a significant amount of dust and debris, requiring proper containment and cleanup.Potential for Damage: — Improper techniques can damage the underlying drywall, leading to costly repairs.Understanding Finishing Levels: Achieving the Perfect Look
The level of finishing you choose will significantly impact the final appearance of your ceiling. Here's a breakdown of common options:
Level 3: — Suitable for areas where appearance is not critical. Nail heads and joints are visible.Level 4: — The most common level, providing a smooth surface suitable for most paint finishes.Level 5: — The highest level of finish, creating a perfectly smooth and uniform surface ideal for high-gloss paints or critical lighting conditions. This is common in luxury homes in areas like Forest Hill and Rosedale.The Importance of Proper Preparation and Cleanup
Proper preparation and cleanup are essential for a successful popcorn ceiling removal project.
Protecting Your Home: — Covering furniture, floors, and walls with plastic sheeting is crucial to prevent dust and debris from spreading.Ventilation: — Ensuring adequate ventilation is essential to minimize dust and fumes.Containment: — Sealing off the work area is crucial to prevent dust and debris from contaminating other parts of your home.Professional Cleanup: — Hiring a professional cleaning service can help ensure that all dust and debris are properly removed.Choosing the Right Contractor: Key Considerations
Selecting the right contractor is crucial for a smooth and successful popcorn ceiling removal project.
Experience and Expertise: — Choose a contractor with extensive experience in popcorn ceiling removal.Licensing and Insurance: — Ensure that the contractor is properly licensed and insured.References and Reviews: — Check online reviews and ask for references from previous clients.Detailed Estimates: — Obtain detailed written estimates that clearly outline the scope of work and the associated costs.Communication: — Choose a contractor who communicates clearly and responds promptly to your questions and concerns.Popcorn Ceiling Removal in Specific Toronto Neighborhoods:
Different neighborhoods in Toronto and the GTA may present unique challenges and considerations for popcorn ceiling removal:
[popcorn ceilings in older homes](/blog/popcorn-ceiling-older-homes)s in The Annex or Cabbagetown: — These homes are more likely to contain asbestos, requiring specialized abatement procedures.Condos in CityPlace or Liberty Village: — Condo buildings may have specific rules and regulations regarding noise levels and working hours.Newer Homes in Vaughan or Markham: — These homes may have more modern ceiling textures and finishes, requiring different removal techniques.What are the Benefits of Removing Popcorn Ceiling?
Removing popcorn ceiling offers several benefits for homeowners in Toronto and the GTA:
Improved Aesthetics: — Creates a more modern and updated look.Increased [impact on home value](/blog/popcorn-ceiling-home-value-impact): — Can increase the value of your home.Improved Air Quality: — Eliminates dust and allergens that can accumulate in the popcorn texture.Easier to Clean: — [smooth vs popcorn ceiling comparison](/blog/popcorn-ceiling-vs-smooth-ceiling)s are easier to clean and maintain.Better Lighting: — Smooth ceilings reflect light more effectively, making rooms brighter.How long does popcorn ceiling removal take per room?
The timeline for popcorn ceiling removal varies depending on the size of the room, the complexity of the project, and the presence of asbestos. Generally, a standard bedroom can be completed in 1-2 days, while a larger living room may take 2-3 days.
What are some alternatives to popcorn ceiling removal?
If you're not ready to remove your popcorn ceiling, there are some alternatives you can consider:
Skim Coating: — Applying a thin layer of drywall compound over the existing popcorn texture to create a smooth surface.Ceiling Tiles: — Installing ceiling tiles over the popcorn texture.Paneling: — Covering the popcorn ceiling with wood paneling.How to Prepare Your Home for Popcorn Ceiling Removal
Preparing your home properly before the popcorn ceiling removal team arrives is crucial for a smooth and efficient process. Here’s a checklist:
Remove all furniture: — If possible, remove all furniture from the room. If not, cover it completely with plastic sheeting.Remove wall decorations: — Take down all pictures, mirrors, and other wall decorations.Cover floors: — Protect your floors with drop cloths or plastic sheeting.Seal off the room: — Seal off the room with plastic sheeting to prevent dust from spreading to other areas of your home.Inform your neighbors: — If you live in a condo or townhouse, inform your neighbors about the upcoming work.Frequently Asked Questions
What is the average cost to remove popcorn ceiling in Toronto?
The average cost to remove popcorn ceiling in Toronto ranges from $3.00 to $8.00 per square foot, depending on the factors mentioned above. This includes removal, finishing, and painting.
How can I tell if my popcorn ceiling contains asbestos?
The only way to know for sure if your popcorn ceiling contains asbestos is to have it tested by a certified professional. We can arrange for asbestos testing in Toronto as part of our service.
What type of paint should I use after popcorn ceiling removal?
Use a high-quality primer and paint specifically designed for ceilings. Consider using a mold-resistant paint in bathrooms and kitchens.
Can you match the existing ceiling texture in other rooms?
Yes, we can match existing ceiling textures to ensure a seamless look throughout your home. We offer a variety of ceiling texture matching services.
Plan your popcorn ceiling removal project with confidence. Contact us today for a free, no-obligation quote.
Call 1-289-806-1616