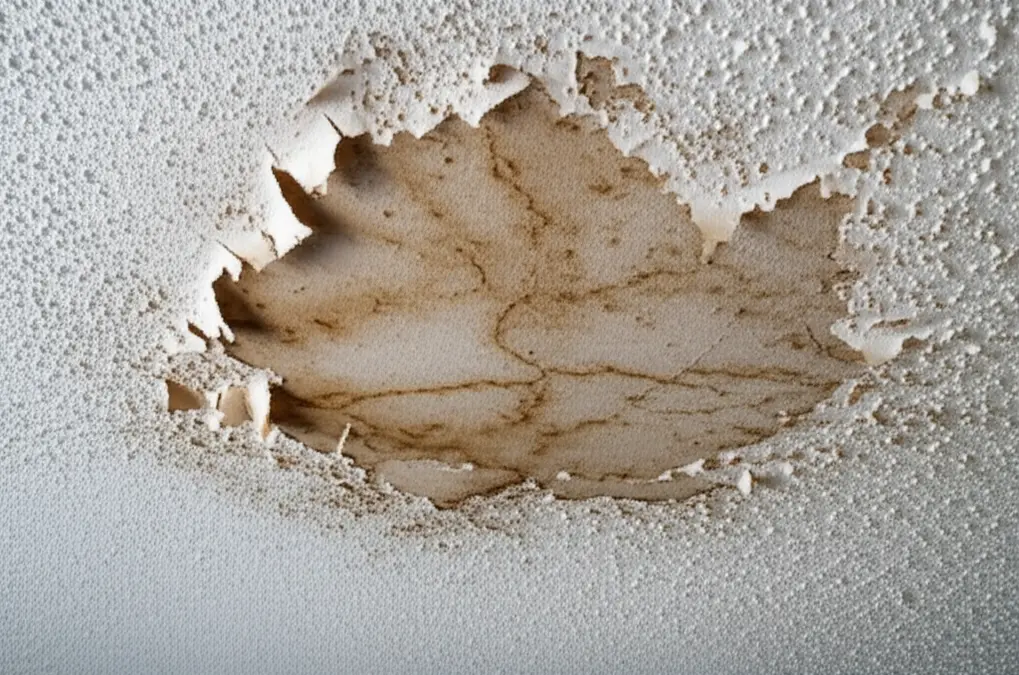
Ceiling Repair After Water Leak: Complete Guide
Experiencing a ceiling repair after a water leak can be a daunting prospect for any homeowner. Not only does it involve dealing with the aftermath of water damaged ceiling repair, but it also requires a thorough understanding of repair techniques and potential costs. This comprehensive guide will walk you through the essential steps for effective water leak ceiling repair, ensuring that you can restore your home's integrity while adhering to local regulations, such as the Ontario Building Code.
Understanding Water Damage
Water leaks can originate from various sources, including:
Identifying the source of the leak is crucial before proceeding with any repairs. Ignoring the underlying problem can lead to recurring issues, making the repair process more extensive and costly. Addressing the root cause could involve anything from replacing a section of your roof in Etobicoke to fixing a leaky faucet in your North York condo.
Assessing the Damage
Before you begin your ceiling repair after a water leak, it's essential to assess the extent of the damage. Here’s how you can do that:
Repairing the Ceiling
Once you have assessed the damage and resolved the source of the leak, you can proceed with the repair. Here are the steps involved in a typical ceiling repair after water leak:
1. Gather Your Materials
You'll need the following materials:
Consider purchasing these supplies from a local hardware store such as Home Depot or Lowe's in Toronto.
2. Remove Damaged Material
3. Replace with New Material
4. Finish the Surface
5. Texture (If Applicable)
If your ceiling features a popcorn texture, you'll need to replicate this finish:
Dealing with Popcorn Ceilings and Asbestos
Many popcorn ceilings in older homess in areas like The Beaches and Rosedale in Toronto may have popcorn ceilings. Before you start any removal or repair work on a popcorn ceiling, it's crucial to test for asbestos. Asbestos was a common component of popcorn ceilings until the late 1970s and can pose serious health risks if disturbed.
If your popcorn ceiling tests positive for asbestos, you should NOT attempt to remove or repair it yourself. Instead, hire a qualified asbestos abatement contractor to safely remove the ceiling.
If the ceiling does not contain asbestos, you can proceed with repairs as described above. However, removing a popcorn ceiling is a messy and time-consuming process. Consider hiring a professional to remove the ceiling and skim coat the surface for a smooth, modern look. You can find reputable contractors in Toronto through online directories or by asking for referrals from friends and neighbors.
Cost of Ceiling Repair after Water Leak
The cost of ceiling repair can vary significantly based on the extent of the damage, the materials used, and labor costs in the Greater Toronto Area (GTA). Here’s a rough estimate:
These costs can be affected by:
In cities like Toronto, Mississauga, and Brampton, labor rates can impact the overall cost. It’s advisable to get quotes from multiple contractors to ensure a fair price. Be sure to get written estimates that clearly outline the scope of work and the cost of materials and labor. Don't be afraid to ask questions and negotiate the price.
Preventing Future Water Damage
To avoid the stress of future ceiling repairs, consider the following preventative measures:
When to Call a Professional
While minor repairs can often be handled by homeowners, significant damage or recurring leaks should be addressed by professionals. A qualified contractor can ensure that the repairs adhere to the local building code and regulations, providing peace of mind.
Consider calling a professional if:
A qualified contractor will have the experience, expertise, and equipment to properly assess the damage, identify the source of the leak, and perform the necessary repairs. They can also ensure that the repairs are done safely and according to code. They can also advise on related services like popcorn ceiling removal.
For expert assistance with your ceiling repair after a water leak, call 289-806-1616 to speak with one of our specialists at PopcornFree. We service all areas of the GTA, from downtown Toronto Toronto to Markham and beyond.
Understanding Insurance Coverage for Water Damage
Navigating insurance claims after water damage can be stressful. Here's what you should know:
* Review Your Policy: Carefully read your homeowner's insurance policy to understand what is covered and what is not. Pay attention to any exclusions or limitations related to water damage.
* Document the Damage: Take photos and videos of the damage to your ceiling and any other affected areas. This documentation will be helpful when filing your insurance claim.
* Report the Damage Promptly: Contact your insurance company as soon as possible to report the water damage. The sooner you report the damage, the sooner they can begin processing your claim.
* Prevent Further Damage: Take steps to prevent further damage to your property. This may include covering the damaged area with a tarp or removing valuables from the affected area.
* Get Multiple Quotes: Obtain quotes from several contractors for the repair work. Your insurance company may require you to get multiple quotes before approving your claim.
* Cooperate with the Insurance Adjuster: Work closely with the insurance adjuster to provide them with the information they need to process your claim. Be honest and transparent in your communications.
* Understand the Deductible: Be aware of your deductible, which is the amount you will have to pay out of pocket before your insurance coverage kicks in.
* Keep Records: Keep detailed records of all communications with your insurance company, as well as any expenses you incur related to the water damage.
Working with an experienced contractor can also help streamline the insurance claim process, as they can provide detailed estimates and documentation to support your claim.
Choosing the Right Contractor for Your Ceiling Repair
Selecting the right contractor is crucial for a successful ceiling repair. Here are some tips to help you choose the best professional for the job:
* Get Referrals: Ask friends, family, and neighbors for referrals to reputable contractors in your area.
* Check Online Reviews: Read online reviews and testimonials to get an idea of other customers' experiences with the contractor. Look for contractors with consistently positive reviews.
* Verify Credentials: Make sure the contractor is licensed and insured. This will protect you in case of accidents or damages during the repair process.
* Get Multiple Quotes: Obtain quotes from several contractors and compare their prices, services, and warranties.
* Ask Questions: Don't be afraid to ask the contractor questions about their experience, qualifications, and approach to the repair.
* Review the Contract: Carefully review the contract before signing it. Make sure it clearly outlines the scope of work, the cost of materials and labor, the payment schedule, and the warranty information.
* Trust Your Gut: Choose a contractor that you feel comfortable working with and that you trust to do a good job.
Remember that the cheapest option isn't always the best. Focus on finding a contractor who is qualified, experienced, and reputable, even if they charge a bit more.
Frequently Asked Questions
What should I do immediately after a water leak?
Take immediate action to stop the source of the leak. Next, dry the area as quickly as possible to prevent mold growth. You may need to use fans or dehumidifiers for effective drying. Contact a professional for water damage assessment.
How can I tell if my ceiling is structurally sound after water damage?
Inspect the ceiling for sagging or soft spots. If you are unsure, it's best to consult a professional who can evaluate the structural integrity and recommend repairs if needed. Look for signs of bowing or cracking that indicate more serious structural issues.
Can I repair water-damaged ceilings myself?
Yes, minor repairs can often be completed by homeowners. However, if the damage is extensive or involves structural elements, hiring a professional is recommended. Consider your own skill level and the potential risks involved before attempting DIY repairs.
How long does it take to repair a ceiling after a water leak?
The time frame for repairs can vary based on the extent of the damage. Minor repairs may take a few hours, while more extensive damage could take several days to complete. The drying time for the affected area can also add to the overall timeline.
Is it necessary to repaint the entire ceiling after a repair?
Not necessarily. If you can match the paint color, you may only need to repaint the repaired area. However, for a uniform appearance, consider repainting the entire ceiling. Feathering the paint into the surrounding area can also help to blend the repaired section.
What do I need to know about local regulations?
Always adhere to the Ontario Building Code when performing repairs. In some cases, you may need permits for extensive work, especially if it affects structural elements. Check with your local municipality (e.g., City of Toronto, City of Mississauga) for specific requirements.
How do I prevent mold growth after a water leak?
Thoroughly dry the affected area within 24-48 hours to prevent mold growth. Use fans, dehumidifiers, and open windows to circulate air. If you suspect mold growth, consult a professional mold remediation specialist.
What are the signs of a hidden water leak?
Signs of a hidden water leak can include:
* Unexplained increases in your water bill
* Dampness or discoloration on walls or ceilings
* Musty odors
* The sound of running water when no fixtures are in use
* Foundation cracks
If you suspect a hidden water leak, contact a plumber to locate and repair the leak.
For more information on ceiling repair and other home renovation needs, visit our blog on water damage restoration or check out our services in Scarborough.
Don't let a water leak damage your home and your peace of mind. Call us today at 289-806-1616 for a free consultation and estimate!