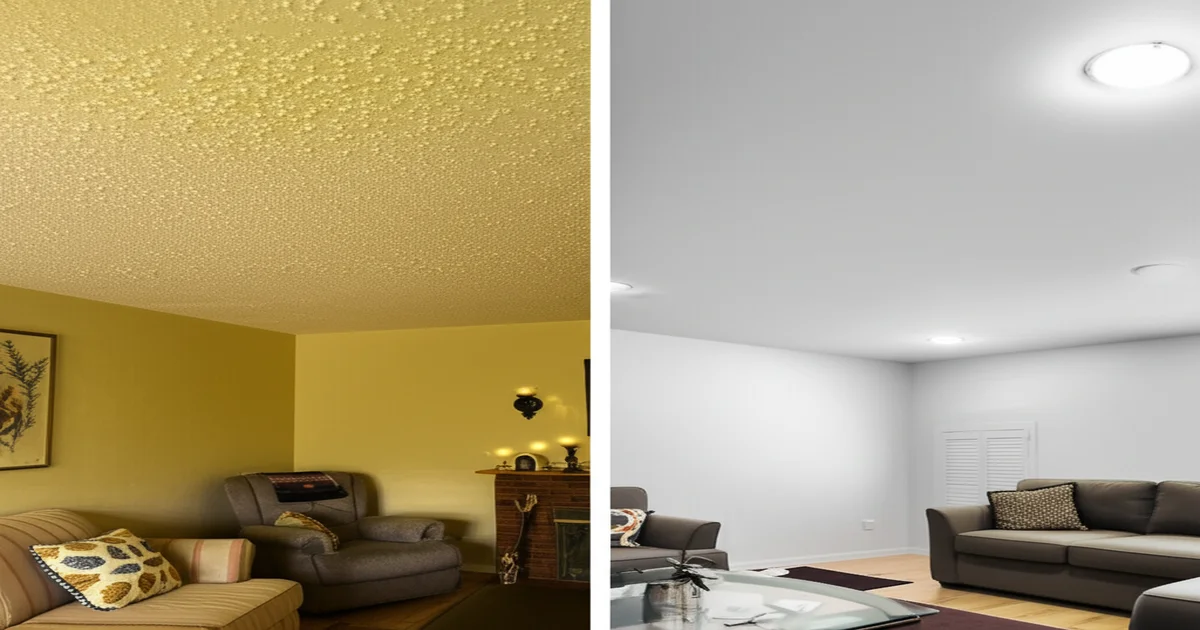
Ceiling Drywall Installation in Toronto: Professional Guide
Ceiling drywall installation in Toronto is a fundamental service for homeowners renovating, repairing, or upgrading their homes. Whether finishing a basement, replacing damaged ceiling material, or installing new drywall after popcorn ceiling removal, professional ceiling drywall work ensures structural integrity and a flawless finished appearance. Across the Greater Toronto Area — from Mississauga and Brampton to Vaughan, Markham, and beyond — quality ceiling drywall is the foundation of every beautiful ceiling.
Installing drywall on ceilings is significantly more challenging than wall installation. Working overhead with heavy sheets, managing proper fastening patterns, and achieving seamless joints requires professional skill. This guide covers everything Toronto homeowners need to know about ceiling drywall installation.
Call 289-806-1616 for professional ceiling drywall installation in Toronto and the GTA.
When You Need Ceiling Drywall
After Popcorn Ceiling Removal — When texture is removed, underlying drywall may be damaged or thin. New drywall provides the ideal surface for smooth finishing. Visit our popcorn ceiling removal guide. In older homes in areas like The Beaches or Rosedale, the original drywall might be particularly brittle and necessitate replacement after popcorn ceiling removal.
Water Damage Repair — Severe water damage requires removing and replacing ceiling drywall. Water-soaked drywall loses structural integrity. See water damaged ceiling repair. Leaks from old plumbing in Victorian homes in Cabbagetown or Little Italy are common causes of water damage requiring drywall replacement.
Basement Finishing — Unfinished basements with exposed joists need complete ceiling drywall installation — one of the most common GTA projects. Many homeowners in burgeoning areas like Liberty Village and CityPlace are finishing their basements to maximize living space.
Renovation Projects — Kitchen expansions, room additions, open-concept conversions frequently require new ceiling drywall. Modernizing homes in established neighborhoods like Forest Hill or Lawrence Park often involves significant structural changes requiring new drywall.
Ceiling Replacement — Severely damaged, sagging, or deteriorated ceilings may need complete replacement. popcorn ceilings in older homess in areas like Leslieville or Riverdale may have ceilings that have reached the end of their lifespan.
Overlay Installation — New drywall over existing popcorn ceilings as popcorn ceiling encapsulation strategy. This approach is popular in condos in downtown Toronto where extensive renovations may be restricted.
Types of Ceiling Drywall
Standard Drywall (1/2 inch)
Most common ceiling drywall. For joists spaced 16 inches on centre. Cost: $0.40–$0.60/sq ft. Suitable for most residential applications in areas like Scarborough or Etobicoke.
Lightweight Drywall (1/2 inch)
25% lighter than standard. Easier overhead handling, reduced ceiling load. Cost: $0.50–$0.75/sq ft. A good choice for older homes in neighborhoods like High Park or The Annex where structural support may be a concern.
5/8-inch Drywall
Required by Ontario Building Code for some ceiling applications, particularly fire-rated assemblies and 24-inch joist spacing. Cost: $0.55–$0.80/sq ft. Often used in multi-unit dwellings or townhouses in areas like North York to meet fire safety standards.
Moisture-Resistant Drywall
Essential for bathrooms, kitchens, laundry rooms. Green board or purple board provides mold and moisture resistance. Cost: $0.60–$0.90/sq ft. Crucial in areas like the Entertainment District where high-rise living can lead to increased humidity.
Fire-Rated (Type X) Drywall
Required by Ontario Building Code between living spaces and attached garages. One-hour fire resistance. Cost: $0.55–$0.85/sq ft. A must-have for homes with attached garages in suburban areas like Richmond Hill or Oakville.
Sound-Dampening Drywall
Products like QuietRock that significantly reduce sound transmission. Ideal between floors. Cost: $1.50–$3.00/sq ft. Popular in condos and townhouses in densely populated areas like Yonge and Eglinton to minimize noise pollution.
Installation Process
Step 1: Assessment — Inspect joist structure, verify spacing and condition, identify utilities, plan sheet layout, determine drywall type per Ontario Building Code. This is especially important in older Toronto homes where original construction may not meet current standards.
Step 2: Preparation — Install blocking between joists for edges. Complete electrical, plumbing, HVAC work in ceiling cavity. Install insulation and vapour barrier if required. Ensure all wiring is up to code, especially in areas like downtown Toronto where older buildings may have outdated electrical systems.
Step 3: Installation — Sheets lifted with drywall lift. Fastened with screws at 12 inches on edges, 16 inches in field. Sheets staggered to avoid continuous joints. Proper screw placement is crucial to prevent sagging, especially with the wide temperature fluctuations experienced in the GTA.
Step 4: Taping and Mudding — Joint tape embedded in compound at all seams. Three progressively wider coats applied. Each coat dries 24 hours minimum. In humid Toronto summers, proper drying time is essential to prevent cracking and ensure a smooth finish.
Step 5: Sanding and Finishing — All joints sanded smooth. Inspected under raking light. Touch-up compound applied. Final sanding produces uniform surface. Dust control is vital during sanding, especially in older homes in areas like Rosedale that may contain lead paint.
Step 6: Priming and Painting — Quality primer seals new drywall. Two coats of ceiling paint for finished appearance. Choose a paint formulated for ceilings to minimize glare and hide imperfections.
Cost of Installation in Toronto
| Component | Cost/sq ft |
|---|---|
| Material (standard 1/2") | $0.40–$0.60 |
| Labour (installation) | $1.50–$3.00 |
| Taping and mudding | $1.00–$2.00 |
| Sanding and finishing | $0.50–$1.00 |
| Priming | $0.30–$0.50 |
| **Total installed** | **$3.70–$7.10** |
By project size:
Additional: demolition ($1.00–$2.00/sq ft), electrical work, insulation, painting. Demolition costs can be higher in older Toronto homes due to the presence of asbestos or other hazardous materials.
Ontario Building Code Requirements
Call 289-806-1616 for expert ceiling drywall meeting all Ontario Building Code requirements. We ensure all installations comply with the latest regulations, providing peace of mind for homeowners across the GTA.
Alternatives to Drywall: Exploring Other Ceiling Options
While drywall is a standard and reliable choice for ceilings, several alternatives offer unique aesthetic qualities, performance benefits, or installation advantages. Here are a few options to consider for your Toronto home:
Drywall Overlay vs. Removal: Which is Right for You?
When dealing with an existing ceiling, particularly one with an outdated texture like popcorn, homeowners often face a choice: overlay the existing ceiling with new drywall or remove the old ceiling entirely before installing new drywall. Both options have pros and cons:
Drywall Overlay (Encapsulation):
* Pros:
* Faster and less messy than removal.
* Can be a more cost-effective option.
* Avoids the potential mess and hazards associated with removing textured ceilings, particularly those containing asbestos (common in older Toronto homes).
* Cons:
* Adds weight to the ceiling structure. It's crucial to ensure the existing joists can support the added load, especially in older homes in neighborhoods like The Annex or Cabbagetown.
* Can reduce ceiling height slightly.
* May not be suitable if the existing ceiling is severely damaged or uneven.
* Doesn't address any underlying issues like mold or water damage.
Drywall Removal:
* Pros:
* Allows for inspection and repair of the joist structure and any underlying issues.
* Provides a completely smooth and level surface for new drywall.
* Can increase ceiling height slightly.
* Eliminates the risk of asbestos exposure (if the existing ceiling contains asbestos and is properly abated).
* Cons:
* More time-consuming and messy than overlay.
* More expensive due to demolition and disposal costs.
* Requires careful handling and disposal of materials, especially if asbestos is present.
Factors to Consider:
* Condition of the Existing Ceiling: If the existing ceiling is in good condition and structurally sound, overlay may be a viable option. If it's damaged, sagging, or uneven, removal is likely the better choice.
* Weight Capacity of the Joists: Consult with a structural engineer or experienced contractor to ensure the joists can support the added weight of a drywall overlay, especially in older Toronto homes.
* asbestos testing in Toronto: If your home was built before the 1980s, have the existing ceiling tested for asbestos before considering either overlay or removal. Asbestos abatement must be performed by a certified professional.
* Budget: Overlay is typically less expensive than removal, but the long-term costs may be higher if underlying issues are not addressed.
* Ceiling Height: If ceiling height is a concern, removal may be the preferred option to maximize vertical space.
Achieving a Perfect Finish: Drywall Taping and Mudding Techniques
The key to a flawless ceiling drywall installation lies in the taping and mudding process. This involves applying joint compound to the seams between drywall sheets to create a smooth, seamless surface. Here are some tips for achieving a professional finish:
* Use Quality Joint Compound: Choose a joint compound that is specifically designed for taping and mudding. All-purpose compound can be used, but specialized compounds offer better adhesion, workability, and sanding properties.
* Embed the Tape Properly: Apply a thin layer of compound to the seam and then embed the joint tape into the compound. Use a drywall knife to press the tape firmly into the compound, removing any air bubbles or excess compound.
* Apply Multiple Coats: Apply at least three coats of compound to each seam, allowing each coat to dry completely before applying the next. Each coat should be wider than the previous one, feathering out the edges to create a smooth transition.
* Sand Carefully: Sand the dried compound with a fine-grit sandpaper to remove any imperfections. Use a sanding pole or block to reach high areas and maintain a consistent pressure.
* Use a Raking Light: Use a raking light (a light held at a low angle) to inspect the finished surface for any imperfections. This will highlight any bumps, ridges, or dips that need to be corrected.
* Consider a Level 5 Finish: For the smoothest possible finish, consider applying a skim coat of compound over the entire ceiling surface. This is known as a Level 5 finish and is recommended for ceilings that will be painted with a flat or matte paint.
Proper ventilation is key during the taping and mudding process, especially in older Toronto homes that may have poor air circulation.
The Importance of Proper Ventilation During Drywall Installation
Ventilation is often overlooked, but it plays a crucial role in ensuring a successful and healthy drywall installation. Here's why ventilation is important and how to achieve it:
* Drying Time: Joint compound and paint require proper drying time to cure properly. Adequate ventilation helps to speed up the drying process and prevent moisture buildup, which can lead to mold growth.
* Dust Control: Sanding drywall creates a significant amount of dust. Proper ventilation helps to remove dust from the air, reducing the risk of respiratory irritation and improving indoor air quality.
* Fume Removal: Some drywall products and paints release fumes that can be harmful to breathe. Ventilation helps to remove these fumes from the air, creating a healthier working environment.
* Temperature Control: Ventilation can help to regulate the temperature in the room, preventing extreme heat or cold that can affect the drying and curing of drywall products.
How to Achieve Proper Ventilation:
* Open Windows and Doors: Whenever possible, open windows and doors to allow for natural airflow.
* Use Fans: Use fans to circulate air and exhaust dust and fumes.
* Dust Collection Systems: Use a dust collection system when sanding drywall to minimize dust exposure.
* HVAC System: If possible, use the HVAC system to circulate air and control temperature and humidity.
In older Toronto homes with poor ventilation, it may be necessary to use portable air purifiers to improve indoor air quality during drywall installation.
How to Find a Reputable Drywall Contractor in Toronto
Finding the right drywall contractor is essential for ensuring a successful and stress-free project. Here are some tips for finding a reputable drywall contractor in Toronto:
* Get Referrals: Ask friends, family, and neighbors for referrals.
* Check Online Reviews: Read online reviews on sites like Google, Yelp, and HomeStars.
* Verify Licensing and Insurance: Ensure the contractor is licensed and insured.
* Get Multiple Quotes: Get quotes from at least three different contractors.
* Check References: Ask for references and contact them to inquire about the contractor's work.
* Review the Contract Carefully: Read the contract carefully before signing it. Make sure it includes a detailed scope of work, payment schedule, and warranty information information.
* Ask Questions: Don't hesitate to ask questions and address any concerns you may have.
Look for contractors with experience working on homes in your specific neighborhood, as they will be familiar with the unique challenges and requirements of those properties.
Frequently Asked Questions
How long does ceiling drywall installation take?
Single room drywalled in one day, with taping adding 3-4 days (including drying). Full basement typically 5-7 working days to paint-ready finish. Larger projects in areas like Yorkville or The Annex may take longer due to logistical challenges.
Can I install ceiling drywall myself?
Ceiling drywall is one of the most challenging DIY projects. Sheets weigh 50-70 pounds and must be lifted overhead. A drywall lift is essential. Taping and finishing requires significant skill. Professional installation produces much better results. Improper installation can lead to sagging, cracking, and other problems that can be costly to repair.
What size drywall sheets are best for ceilings?
Larger sheets (4x12 feet) create fewer joints but are heavier. Professional crews typically use 4x12 with a mechanical lift. Smaller sheets (4x8 feet) are easier to handle but require more taping and mudding. The best size depends on the size and layout of the room and the experience of the installer.
Do I need to remove existing drywall before installing new?
Not always. If existing drywall is in reasonable condition, overlay is possible. If water-damaged, sagging, or compromised, removal is recommended. Added weight must be evaluated. Asbestos testing is crucial in older homes before any removal work begins.
How do I handle recessed lights with new drywall?
Plan locations before installation. Holes cut for each fixture. Existing lights disconnected before drywall work and reinstalled after. Ensure all electrical work is performed by a licensed electrician to comply with Ontario Electrical Safety Code.
What is the difference between Level 4 and Level 5 finish?
Level 4: taped joints with three coats of compound. Level 5 adds a skim coat over the entire surface for the smoothest finish. Level 5 recommended for flat/matte paint where imperfections are most visible. Level 5 finishes are particularly popular in modern homes with clean lines and minimalist designs.
Ensure your ceiling renovation starts with proper drywall installation. Our team delivers code-compliant, beautifully finished ceilings throughout Toronto, Mississauga, Brampton, Vaughan, Markham, and the GTA.
For expert ceiling drywall installation and removal services across the GTA, call us today at 1-289-806-1616 for a free consultation and estimate. Let us help you create the perfect ceiling for your Toronto home!