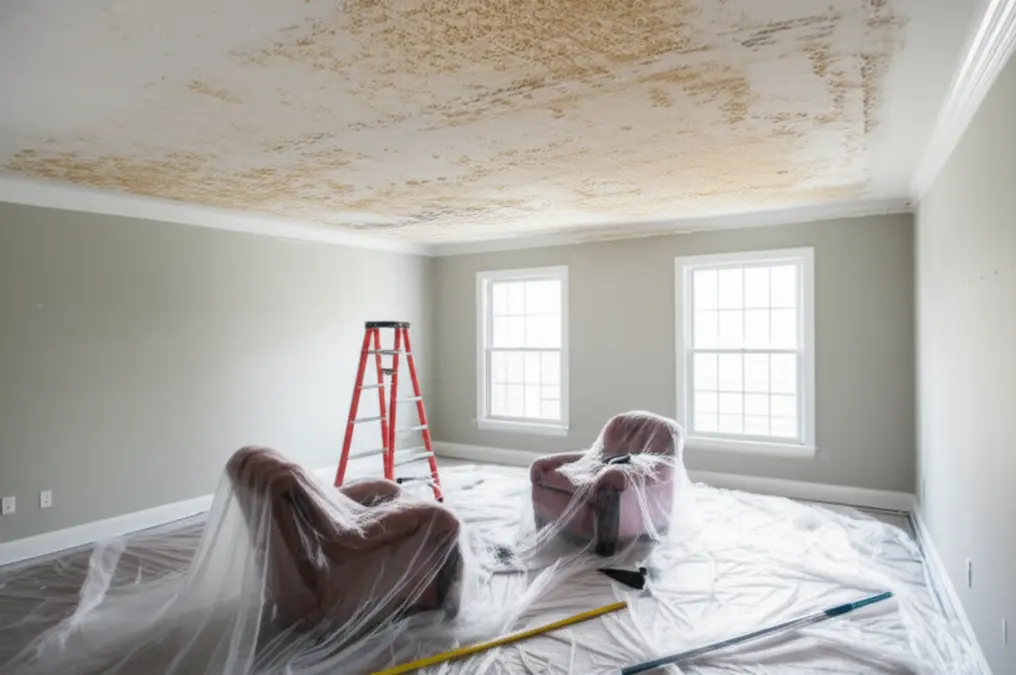
Popcorn Ceiling Removal Timeline: Start to Finish
When it comes to home renovations, understanding the popcorn ceiling removal timeline is crucial for planning your project effectively. Whether you're looking to modernize your space or improve your home's value, the removal of a popcorn ceiling is a significant step. This guide will detail the entire process, from initial planning to the final touches, ensuring you're well-prepared for this home improvement task.
Understanding Popcorn Ceilings
Popcorn ceilings, also known as acoustic ceilings, were popular from the 1950s until the late 1980s. Though they served a practical purpose by concealing imperfections and improving sound absorption, they have since fallen out of favor due to their outdated appearance and difficulty to clean. If you're a homeowner in the Greater Toronto Area (GTA), including cities like Toronto, Mississauga, and Brampton, you might find that removing your popcorn ceiling can significantly enhance your home's aesthetic and resale value. Many homeowners in areas like Etobicoke and Scarborough are opting for smoother, more modern ceiling finishes.
The Popcorn Ceiling Removal Timeline
The timeline for popcorn ceiling removal can vary based on several factors, including the size of the area, the condition of the ceiling, and whether asbestos is present. Here’s a comprehensive breakdown of what you can expect during the process.
Step 1: Planning and Preparation (1-2 Days)
Before you can start removing your popcorn ceiling, you'll need to plan the project carefully. This initial phase includes:
Researching Local Regulations — : Ensure compliance with the Ontario Building Code, especially if you're in cities like Vaughan or Richmond Hill. Check if a permit is needed for your project. It's also wise to check with your local municipality, such as the City of Toronto or Peel Region, for any specific bylaws related to renovations and waste disposal. Regulations may differ even between neighborhoods like The Beaches and North York.Budgeting — : Estimate costs for materials and labor. For popcorn ceiling removal, costs can range from $1 to $3 per square foot, depending on the complexity of the job. Consider the cost of additional services like drywall repair or painting.Hiring Professionals — : If you're not comfortable with DIY, consider hiring a professional contractor. The average cost for professional removal ranges from $1,500 to $2,500 for a standard-sized room. When choosing a contractor, check reviews and ask for references from previous clients in the GTA. Look for companies that are licensed and insured.Step 2: Asbestos Testing (1 Day)
If your home was built before 1986, it’s essential to check for asbestos. This step is crucial for safety and may extend your timeline if asbestos is found. Here’s what to expect during removal:
Testing — : A certified professional will take samples of your popcorn ceiling and send them to a lab. Ensure the professional is certified to handle [asbestos testing in Toronto](/blog/popcorn-ceiling-testing-toronto) and follows proper safety protocols.Results — : Typically, results can take 2-3 days. If asbestos is present, you’ll need to hire an abatement specialist, which can add time and cost to your project. Asbestos abatement can significantly increase the overall cost and timeline, potentially adding several days to the project.Step 3: Ceiling Preparation (1 Day)
Once you’re cleared for removal, you’ll need to prepare the area:
Furniture Removal — : Clear out any furniture and fixtures from the room. Ideally, move furniture to another room or cover it completely with heavy-duty plastic.Covering Floors and Walls — : Use drop cloths and plastic sheeting to protect your floors and walls from debris and dust. Secure the plastic sheeting with painter's tape to prevent it from shifting during the removal process.Turning Off Utilities — : Ensure that any electrical fixtures in the ceiling are turned off to avoid accidents. This includes turning off the breaker for the room to ensure complete safety.Step 4: Removal Process (1-3 Days)
Now comes the core of the project—the actual removal of the popcorn ceiling. The timeline here can vary based on the size of the area:
Spraying Water — : Lightly spray the ceiling with water to loosen the popcorn texture, making it easier to scrape off. Use a spray bottle or garden sprayer for even distribution. Avoid over-saturating the ceiling, as this can damage the drywall underneath.Scraping — : Use a wide putty knife or scraper to remove the popcorn material. Apply gentle, even pressure to avoid gouging the drywall. Work in small sections and overlap each pass to ensure complete removal.Cleaning Up — : After removal, clean up any remaining debris and dust. Use a shop vacuum with a HEPA filter to remove dust particles effectively. Dispose of the debris properly, following local regulations.For an average-sized room (around 300 square feet), this process can take 1-3 days. Larger rooms or ceilings with a particularly stubborn texture may take longer. Ceilings that have been painted over multiple times can also be more difficult to remove.
Step 5: Repair and Finish (1-2 Days)
After the popcorn is removed, you’ll need to address any damage to the ceiling:
Repairing Imperfections — : Patch any holes or imperfections with joint compound. Apply the joint compound in thin layers, allowing each layer to dry completely before applying the next.Sanding — : Sand the ceiling to create a smooth surface. Use a sanding pole with a fine-grit sandpaper for best results. Wear a dust mask to protect yourself from dust particles.Painting — : Apply a fresh coat of paint to finish the ceiling. Use a high-quality primer before painting to ensure proper adhesion and coverage. Apply two coats of paint for a professional finish. Consider using a paint specifically designed for ceilings.This step usually adds another 1-2 days to your timeline, depending on drying times and the number of coats needed. Proper ventilation can help speed up the drying process.
Total Timeline Overview
In summary, here’s a quick breakdown of the entire popcorn ceiling removal timeline:
Planning and Preparation: 1-2 DaysAsbestos Testing: 1 Day (plus 2-3 days for results)Ceiling Preparation: 1 DayRemoval Process: 1-3 DaysRepair and Finish: 1-2 DaysEstimated Total: 5-11 Days (excluding asbestos testing time)
Cost Considerations
When planning your budget for popcorn ceiling removal, consider the following cost factors:
DIY vs. Professional — : DIY removal can save money but may not be suitable for everyone. Professional services generally cost between $1,500 and $2,500. DIY projects require purchasing or renting tools like scrapers, sprayers, and sanding equipment.Material Costs — : Expect to pay about $0.50 to $1.50 per square foot for ceiling materials and paint. Material costs can vary depending on the quality of the materials you choose.Disposal Fees — : If you hire professionals, disposal fees are often included, but if you do it yourself, factor in these costs. Check with your local waste management facility for proper disposal procedures, especially if asbestos is suspected.Unexpected Repairs — : Be prepared for potential unexpected costs related to repairing damage to the drywall or electrical wiring. [popcorn ceilings in older homes](/blog/popcorn-ceiling-older-homes)s in areas like Rosedale and Forest Hill may have hidden issues that require additional attention.Asbestos Abatement — : If asbestos is present, the cost of abatement can significantly increase the overall project budget. Asbestos abatement is a specialized service that requires certified professionals.Factors Affecting the Timeline
Several factors can influence the popcorn ceiling removal timeline. Understanding these factors can help you plan your project more accurately:
Size of the Room: — Larger rooms will naturally take longer to remove the popcorn ceiling than smaller rooms.Complexity of the Ceiling: — Ceilings with intricate designs or multiple layers of popcorn texture will require more time and effort.Presence of Asbestos: — The presence of asbestos adds significant time to the project due to the need for professional abatement.Condition of the Drywall: — If the drywall underneath the popcorn ceiling is damaged or in poor condition, it may require additional repairs, extending the timeline.DIY vs. Professional: — DIY projects often take longer than professional projects due to lack of experience and specialized equipment.Weather Conditions: — Humidity and temperature can affect drying times for joint compound and paint, potentially extending the timeline.Accessibility: — Rooms with difficult access, such as attics or basements, may require more time to complete the removal process.Unexpected Issues: — Unexpected issues, such as electrical problems or plumbing leaks, can arise during the removal process, potentially delaying the project.Tips for a Smooth Popcorn Ceiling Removal
Here are some tips to help ensure a smooth and efficient popcorn ceiling removal process:
Plan Ahead: — Thoroughly plan your project before you begin, including budgeting, scheduling, and material selection.Protect Your Home: — Cover floors, walls, and furniture to protect them from dust and debris.Wear Protective Gear: — Wear a dust mask, safety glasses, and gloves to protect yourself from dust and chemicals.Work in Small Sections: — Work in small sections to ensure complete removal and avoid damaging the drywall.Take Breaks: — Take regular breaks to avoid fatigue and maintain focus.Proper Ventilation: — Ensure proper ventilation in the room to help with drying times and reduce dust exposure.Don't Rush: — Avoid rushing the process, as this can lead to mistakes and damage.Hire Professionals When Needed: — If you're not comfortable with any aspect of the project, hire a professional contractor.Dispose of Waste Properly: — Dispose of waste materials properly, following local regulations.Inspect the Finished Ceiling: — Carefully inspect the finished ceiling for any imperfections and address them promptly.Alternatives to Popcorn Ceiling Removal
If you're hesitant to remove your popcorn ceiling, consider these alternatives:
Covering the Ceiling: — Install drywall or paneling over the existing popcorn ceiling to create a smooth, modern surface. This is less messy than removal but can lower the ceiling height slightly.Applying a Skim Coat: — Apply a thin layer of joint compound over the popcorn ceiling to create a smooth surface. This option requires more skill and effort than covering the ceiling.Texturing the Ceiling: — Apply a new texture over the popcorn ceiling to update its appearance. This option is less expensive than removal but may not completely eliminate the outdated look.Painting the Ceiling: — Painting the popcorn ceiling can freshen up its appearance, but it won't remove the texture. This is the simplest and least expensive option.Each of these alternatives has its own advantages and disadvantages, so carefully consider your options before making a decision.
Popcorn Ceiling Removal in Specific Toronto Neighborhoods
Different neighborhoods in Toronto may present unique challenges for popcorn ceiling removal. Here are some considerations for specific areas:
Older Homes in Rosedale and Forest Hill: — These neighborhoods have many older homes that may contain asbestos. Thorough testing is crucial before beginning any removal work.Condos in Downtown Toronto: — Condo buildings may have specific regulations regarding renovations and noise levels. Check with your condo board before starting your project.Homes in The Beaches and Leslieville: — These areas are known for their tight-knit communities. Be mindful of noise levels and potential disruptions to your neighbors.Newer Homes in North York and Scarborough: — Newer homes are less likely to contain asbestos, but it's still important to verify before starting any removal work.Basement Renovations in Etobicoke: — Basements often have lower ceilings, making popcorn ceiling removal more challenging. Consider the impact on headroom before proceeding.Understanding the specific characteristics of your neighborhood can help you plan your popcorn ceiling removal project more effectively.
After Popcorn Ceiling Removal: Modern Ceiling Options
Once the popcorn ceiling is removed, you have a blank canvas to create a modern and stylish ceiling. Here are some popular options:
Smooth Finish: — A smooth, painted ceiling is a classic and timeless choice.Textured Finish: — Applying a subtle texture can add visual interest to the ceiling.Tray Ceiling: — A tray ceiling adds depth and dimension to the room.Coffered Ceiling: — A coffered ceiling creates a sophisticated and elegant look.Exposed Beams: — Exposing the ceiling beams can add a rustic and industrial touch.Drop Ceiling: — A drop ceiling can conceal wiring and ductwork while providing easy access for maintenance.Decorative Panels: — Installing decorative panels can add texture and visual appeal to the ceiling.Consider your personal style and the overall design of your home when choosing a ceiling finish.
Finding a Reputable Contractor in the GTA
Choosing the right contractor is essential for a successful popcorn ceiling removal project. Here are some tips for finding a reputable contractor in the GTA:
Get Referrals: — Ask friends, family, and neighbors for recommendations.Check Online Reviews: — Read online reviews on websites like Google, Yelp, and HomeStars.Verify Licensing and Insurance: — Ensure the contractor is licensed and insured to operate in Ontario.Get Multiple Quotes: — Obtain quotes from at least three different contractors to compare prices and services.Ask Questions: — Ask the contractor questions about their experience, process, and [warranty information](/blog/popcorn-ceiling-removal-warranty).Review the Contract Carefully: — Review the contract carefully before signing, paying attention to the scope of work, payment schedule, and cancellation policy.Check References: — Contact previous clients to verify the contractor's quality of work.Trust Your Gut: — Choose a contractor you feel comfortable working with and who communicates effectively.Frequently Asked Questions
What is the best way to remove popcorn ceilings?
The most effective way to remove popcorn ceilings is to spray the ceiling with water to loosen the texture before scraping it off with a wide putty knife. For a safer and more efficient process, hiring a professional is recommended, especially if you suspect asbestos.
How long does popcorn ceiling removal take?
The popcorn ceiling removal timeline can range from 5 to 11 days, depending on the size of the area, whether asbestos is present, and the preparation needed. Asbestos testing can add an additional 2-3 days for results.
Is it safe to remove popcorn ceilings myself?
While it is possible to remove popcorn ceilings yourself, it can be hazardous if asbestos is present. Always conduct an asbestos test before attempting removal. If in doubt, hire a professional. Proper safety precautions, including wearing a mask and protective clothing, are essential.
What are the costs associated with popcorn ceiling removal?
Costs for popcorn ceiling removal can range from $1 to $3 per square foot for DIY projects, while hiring a professional can cost between $1,500 and $2,500 for an average-sized room. Additional costs may include asbestos testing and abatement, drywall repair, and painting.
Do I need a permit for popcorn ceiling removal in Ontario?
In most cases, you do not need a permit for popcorn ceiling removal unless you are making significant structural changes to the ceiling. However, it's always best to check with your local municipality to confirm. For example, the City of Toronto has specific guidelines for renovations that may require permits.
Ready to Remove Your Popcorn Ceiling?
Transform your home with a smooth, modern ceiling. Contact us today for a free consultation and estimate. Call 1-289-806-1616 to schedule your appointment.
---
📚 Related Guides
[Complete Guide to Popcorn Ceiling Removal](/blog/popcorn-ceiling-removal-guide-toronto) — Our comprehensive pillar guide